
2014-05-04
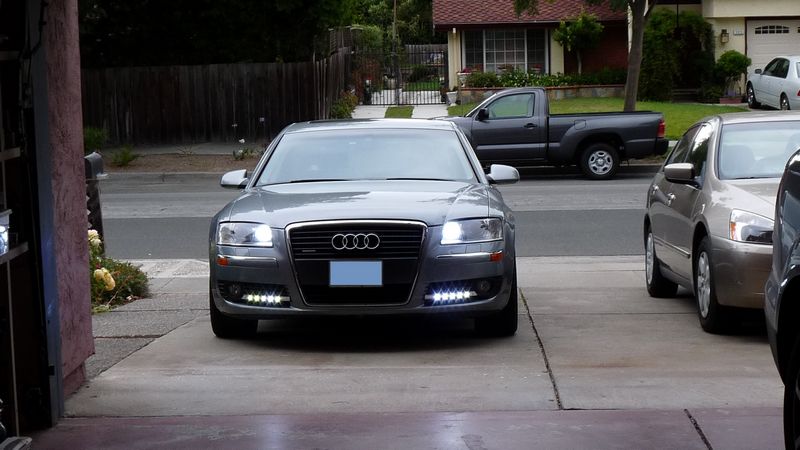
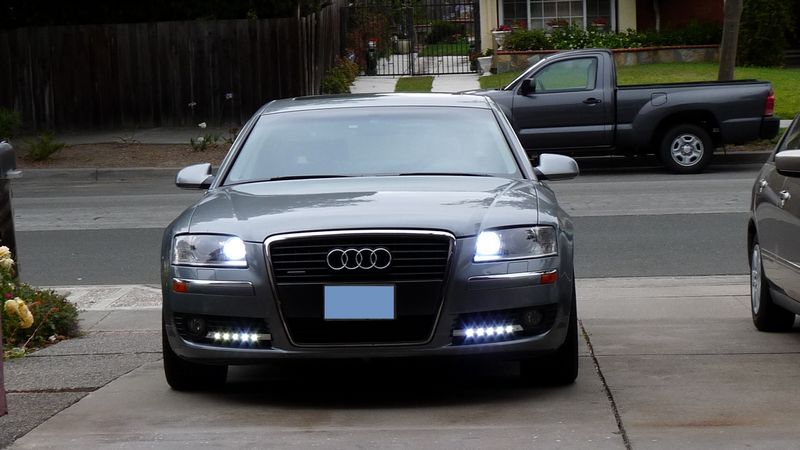
I found a pair of H7 LED bulbs that are bright enough and well built for a reasonable price, I decided to use them for DRL and Xenon. They came out very nicely.

2013-12-05 Leds still work, no codes, no warnings, no fades…. The circuits work.


After driving with all LEDS retrofitted on my A8L for over a month now. No warning lights – no codes – Now, I’m writing about how I did mine. Everyone has his/her own taste, ideas, again this is mine.
I do prefer Day Light LED bulbs over the incandescent tungsten bulbs.
All doors bulbs are 2825 0r 194
Parking lights are 2825 or 194 5W. These need parallel resistors to NOT having “bulbs out” warning display.
DRL (Day running light) are 1156. These need parallel resistors to NOT having “bulbs out” warning display.
License Plate lights. These need parallel resistors or they won’t turn on at all with LEDS.
Trunk lights are 2825 or 194. These need parallel resistors or they won’t turn on at all with LEDS.
vs Tungsten Bulbs and + .
All modern cars, even with Audi A8, the electrical system will sense and notify drivers with warning light when a bulb is burnt (open) for owners to replace as a safety feature. Many car owners go out to buy all these LEDs bulbs to replace their incandescent bulbs and found out they have all these bulb out warning light all over the dash board. Many LEDs dealers even claim they have built-in can-bus or load to by pass these warning lights. I believe all these are sellers marketing strategy to sell products. If you noticed, all these LEDS bulbs prices are very inexpensive, but the cost of shipping is extremely high, because when people return the bulbs after finding out they don’t work, the bulbs don’t cost anything. Please read the Ohm’s law.
Now, if we take out a 20w incandescent bulb – resistance across the terminal is about .2-.6 ohm. According to Ohm’s law, P = VI = I * I*R or we can derive R = (V*V)/P = 12*12/20 = 7.2 ohms when the 20w bulb is fully hot and brightest. So, cold = .2 – .6 ohms and hot = 7.2 ohms (in real life, the car voltage when running could be higher if not well regulated for the lighting system 13V-14V then the hot resistance could be higher). Now, go back to Ohm’s law, when the 20W bulb is hot, the current runs through it will be I = 12V/7.2 ohms = 1.66A – that’s a lot of current through a little bulb.
Bright LED these days will have normal current of 25mA – 30mA (.025A), so I took out the so claim 10W LED bulb and test them – maximum current drawn was 300mA = .3A –> 12V * .3A = 3.6W.
The car system must check the resistance when cold and current drawn when hot – So, if we put a 6 ohms resistors across the LED to simulate the tungsten when hot, then we will fail the .2-2 ohms cold test from the system. Besides, the 6 ohms will totally burns anything that it touches when 2A+ current is going through it. Well, find a metal of some kind to mount it, but I’m sure we’ll still get the warning light. I designed a circuit to satisfy both cold and hot scenarios and it’s working. This one is for DRL 25W 1156 bulb.

PTC = Positive Temperature Coefficient, which acts like a resettable fuse, it sits at .2-2 ohms when cold, when current exceeds maximum current, it will open and the Rload takes over. When the lights are off, no current through it, it became good (close) again. The good thing about PTC, it does have some current run through it even when it’s open, this works for the trunk and license plate lights.
For those who wants to add a DRL strip to the bottom of the fog light grill, this is the circuit for the DRL strip to be bright when in DRL mode, little dimmer when in parking or driving light (night) mode (the bigger resistor, the dimmer it will get), OFF/ON with the blinkers – Need 2 circuits for both sides.

Now, we have a working circuit, all we need is to replace the incandescent bulbs with the nice LEDS, splice the wires to put all resistors and PTC to an area away from everything. Even with 15-20 ohm resistors, they’re still hot, the best is to mount them on a metal surface. I found the house metal electrical box perfect for the job.

Again, this is the way I did mine, if you see something that you want to use, please use your own discretion.
I need to splice the wiring from bulbs sockets, so I need to access to these black boxes behind the left and right light assemblies. On the passenger side, I need to remove the air cleaner housing. On the driver side, I have to remove the front wheel liner to get to these bulbs easier than from the top down. There are 2 videos that show how to remove the air cleaner and the front wheel liner.
Pull out both of the parking and drl sockets for splicing. I only need to splice 1 ground wire (brown) and 2 positive wires (red – parking, white – drl). Plug the LED to make sure the splice is good for each bulb.


Tuck away the wire – there will be pinching by the cover.


Tap the wire for blinking DRL strip.
Since I wanted to put my custom DRL strip with blinking along signal light feature, I need to tap to the signal bulb – remember, I only need to have 1 ground wire for the whole lighting system. The blinker is on the outer edge, it definitely requires to remove the wheel liner for the driver side. The left side I could pull it out with my little hand.


Now I can run all these wires to a resistors and PTC central box for easy fixing in case of failures.


- Goodbye My Wonderful 2006 A8L
- What you should/must know about Audi Electrical System
- Replace Windshield Wipers on A8 D3 2006
3 Comments
Quick question I have a 2006 Audi A8 and the adaptive bulb went out? Can you put an led one ? Also do you know the size of that bulb ?
Thanks
What’s adaptive bulb?