
Well, it’s Christmas and what would someone who loves to make videos, music wants from Santa this year?
.JPG)
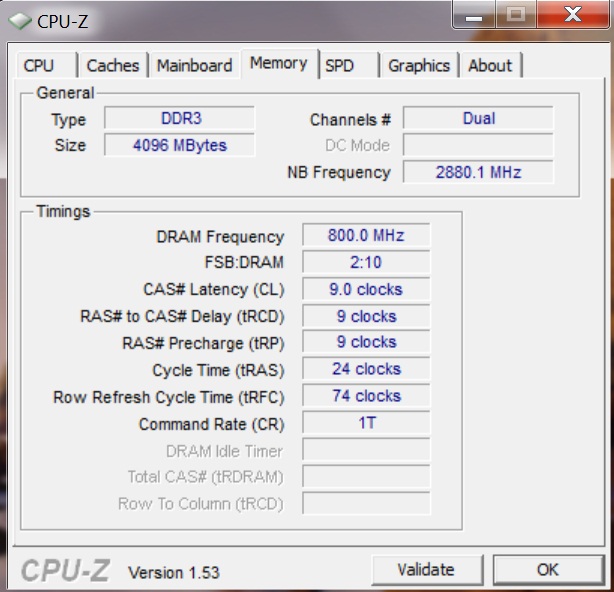
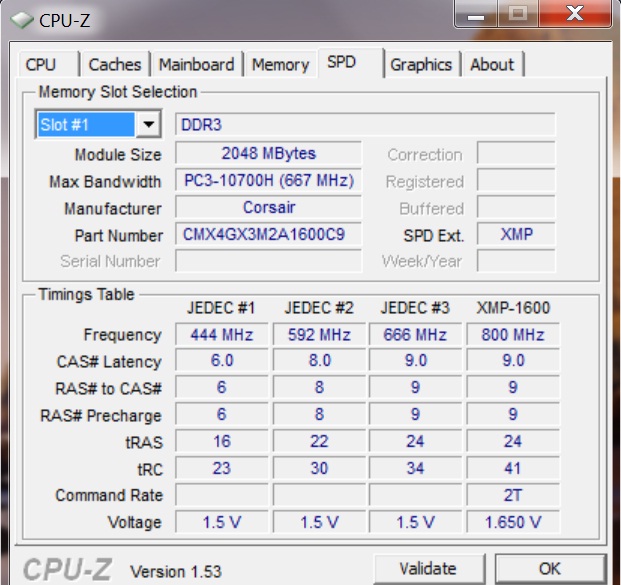
Yes, the new and improved i7 860, Gigabyte P55A-UD3, Corsair 4GB 1600 dual CMX4GX3M2A1600C9, 700W OCZ, Antec 300 case, Seagate 1TB, Pioneer SATA DVD drive.
Antec 300 case: The PS is on the bottom instead of the top which makes cabling a little less organized. It’s a nice and sturdy case for $49.00

The big 120mm fan in front (options) is very nicely caged.
.JPG)
.JPG)
Dual 120 mm fans top and back for maximum air flow.
.JPG)
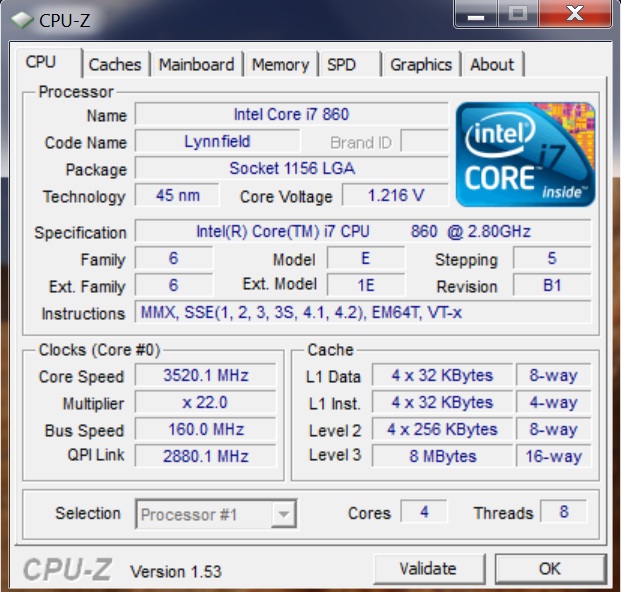
The main parts of the system, i7 860 ($229 @ microcenter) running @ 2.8GHz compares to i7 870 @2.93GHz for $598. We will clock well over the 2.93Ghz. Why i7 860 and not i5 750? The difference between the 2 is $80.00, 4 cores with hyper threading and 4 cores with none. For advanced video encoding, 4 extra threads would be helpful. Normal video encoding like dvd, we only use 4 cores no extra threads. Since Santa was generous, we got the i7 860.
.JPG)
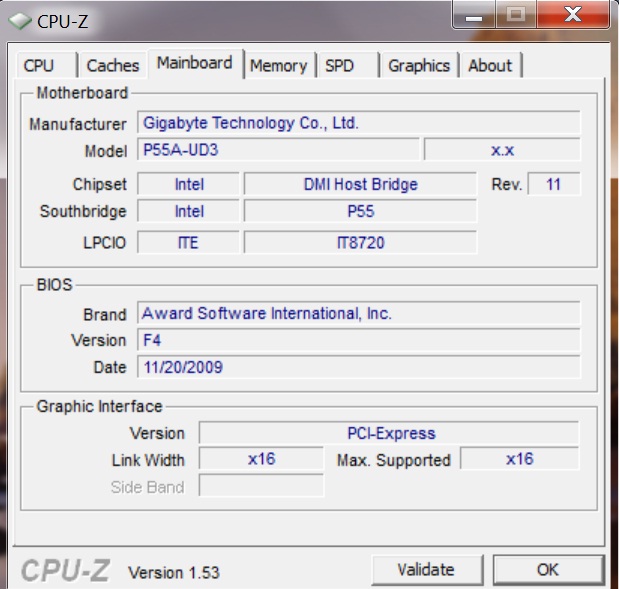
The main board is the most important part of the system if we want to overclock the CPU. We decide to get the new version of P55 which has the “A” which includes the new SATA 3 and USB 3, although none of them exist yet, but we like to be ready for the new technology. So P55A-UD3 ($139 @ Fry’s), it doesn’t have Esata, but when the USB3.0 comes, we don’t need Esata anyhow.
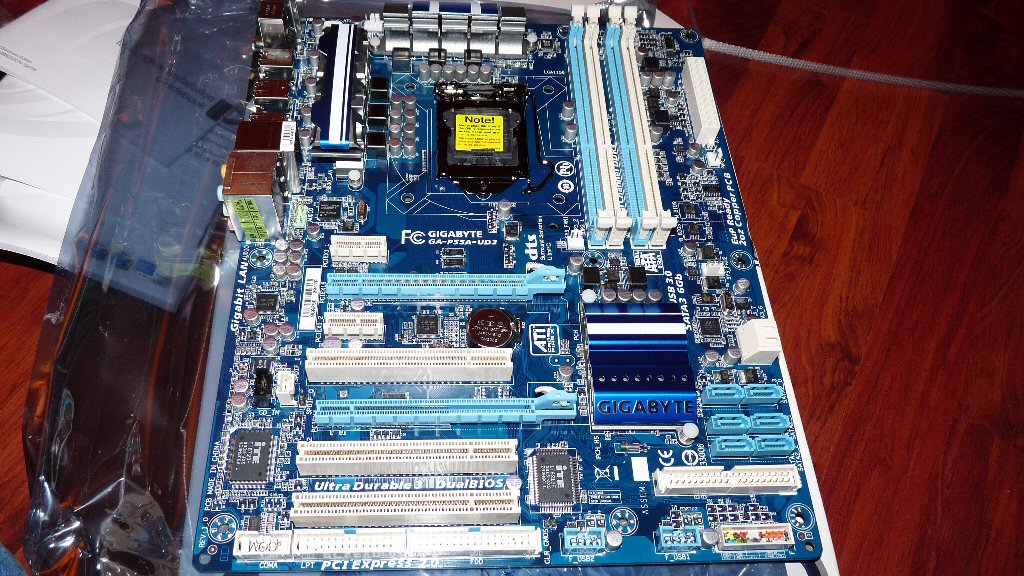
There are no reviews for this board at all, I’ve been using gigabyte forever except the last I built last year which BTW still running flawlessly @ 3.78GHz.
Installation.
The CPU comes with a very small heat sink and fan. The chip is actually smaller than the old 1366 i7-920. The socket is also smaller and 1 clip only.
.JPG)
I love Intel CPU design, no dinky pins sticking out which get bent if you accidentally drop it while installing to the socket. The alignment to the socket is impossible to put it in wrong since there are 2 tooling pins on both side of the chip (well, I wouldn’t be surprised if some “hub” people put it in wrong).
.JPG)
The socket is lotes and not foxconn then I’m OK with OC ing this board. There are some problems with the foxconn sockets.
.JPG)
.JPG)
The board has the memory slots are very close to the CPU, if we plan to have a bigger heat sink, we may have a problem.
.JPG)
This board is a full size, all 9 holes are used. The case is big enough to fit it in very easily.
.JPG)
.JPG)
.JPG)
The power supply is on the bottom which is a nightmare for cabling. Don’t buy this case if you don’t have time to sort out the cables to make it look nice, especially if you have a clear side cover.
.JPG)
Ok it looks ugly, but how does it run?
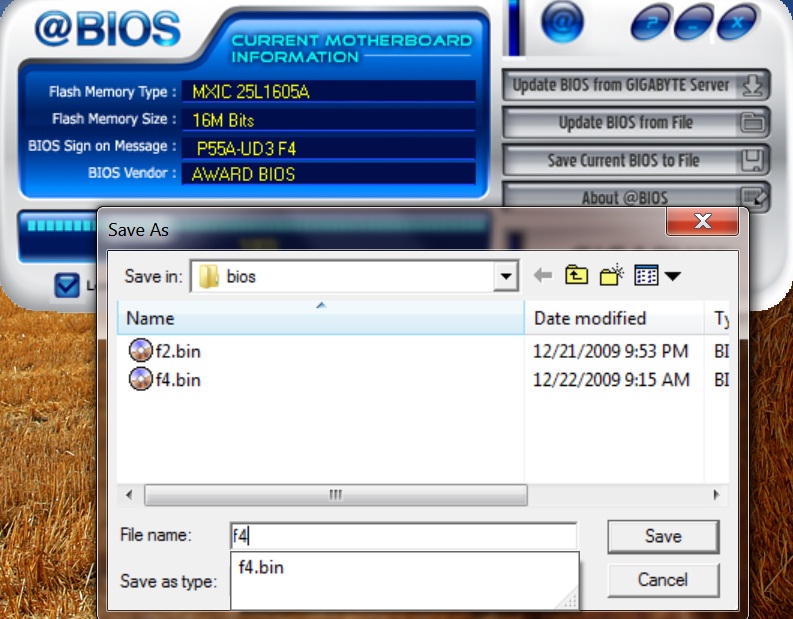
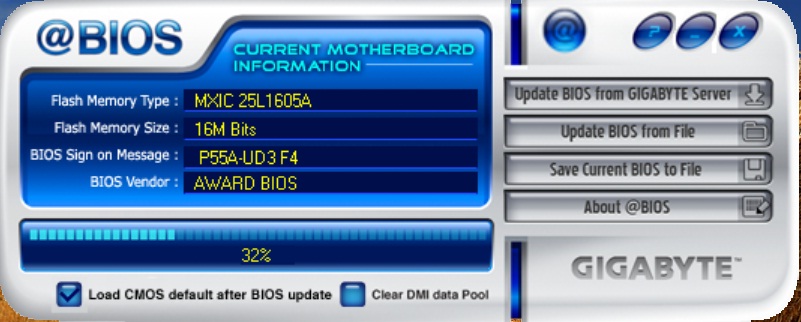
Cabled up everything, flip on the switch and amazingly the board booted up without a hitch. We left everything in bios default. The bios was f2 and the newest one on the website is F4. We loaded the windows 7 without any problem (30minutes). Put in the installation disk and let it to load automatically all drivers. We also install the application @Bios for bios update. We didn’t use the Internet update, downloaded the file and use @bios to do it locally. We make sure there’s no blue screen in the middle of flashing the new bios if we over clock the CPU.
Using @Bios
Back up the old f2 bios, and flash the new bios, it’s very self explanatory on the GUI
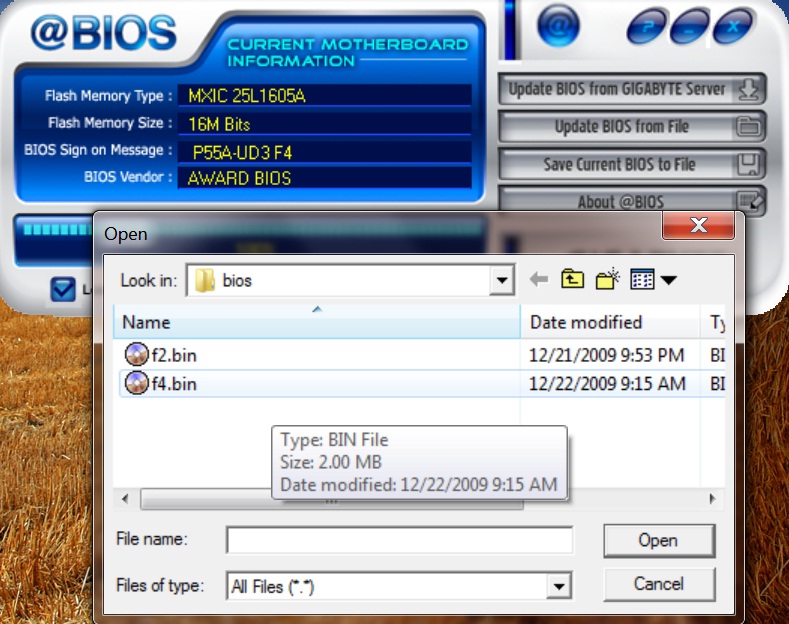
Update BIOS from file
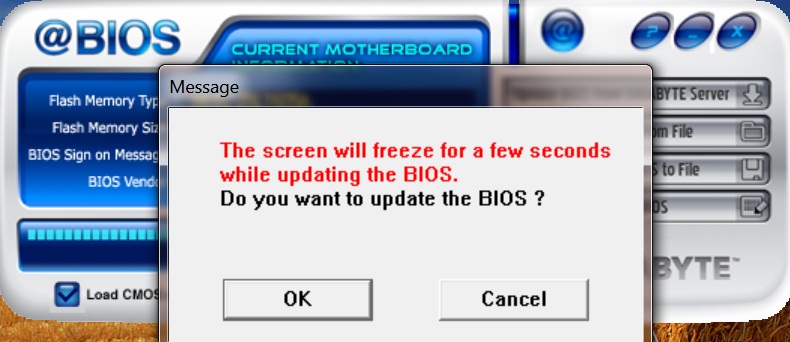
Now we’re ready to try to Overclock this thing.
To get to bios, while computer is booting up, hold the “delete” key until the bios screen is up. This board from Gigabyte, we don’t have to hit Ctr+f1 to access the OC page. It’s right there on the top of the list.
.JPG)
.JPG)
M.I.T current status
.JPG)
Frequency settings: This one has CPU clock ratio, we change it to maximum “22”, baseclock to 160, PCI express to 100
.JPG)
The next one is advanced memory setting, leave it auto.
.JPG)
Advanced voltage settings: CPU org 1.175V to 1.25V Vtt: 1.10/1.21V, PLL 1.8/1.9V, DRAM actually 1.65V is default for this Corsair.
.JPG)
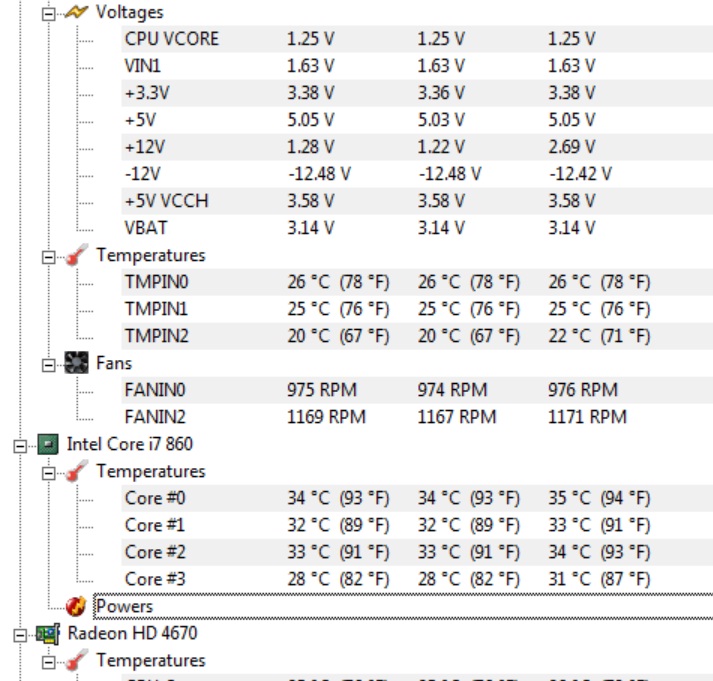
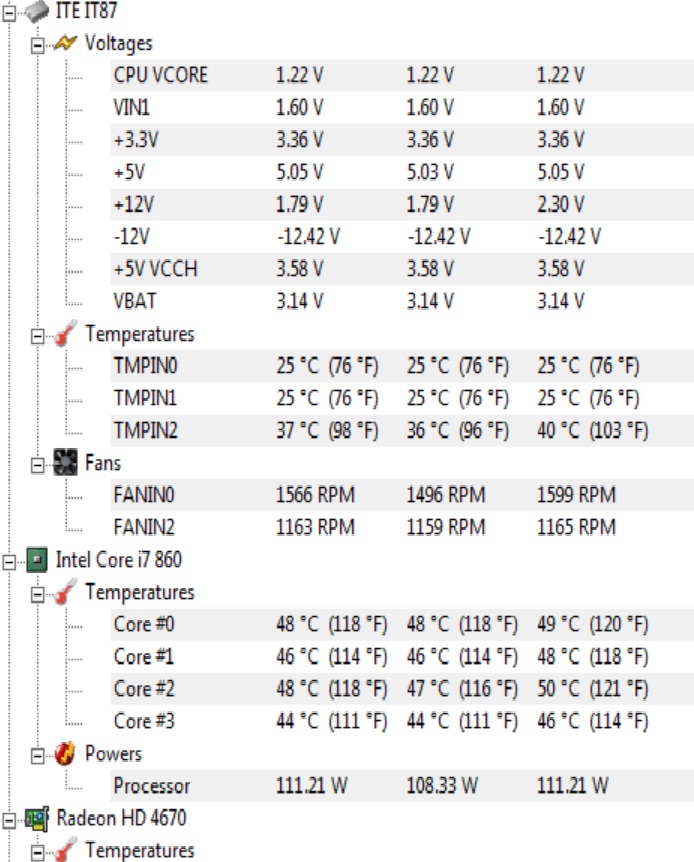
We turn on all the special CPU core features to save power and maximize when needed.
.JPG)
All Extreme Oc people will turn off all these features which we think it’s a waste of power, we like to see when it’s idled, the power should be @26watts to 43watts and when it’s needed to do work, then it can go up to 111watts to 130watts max.
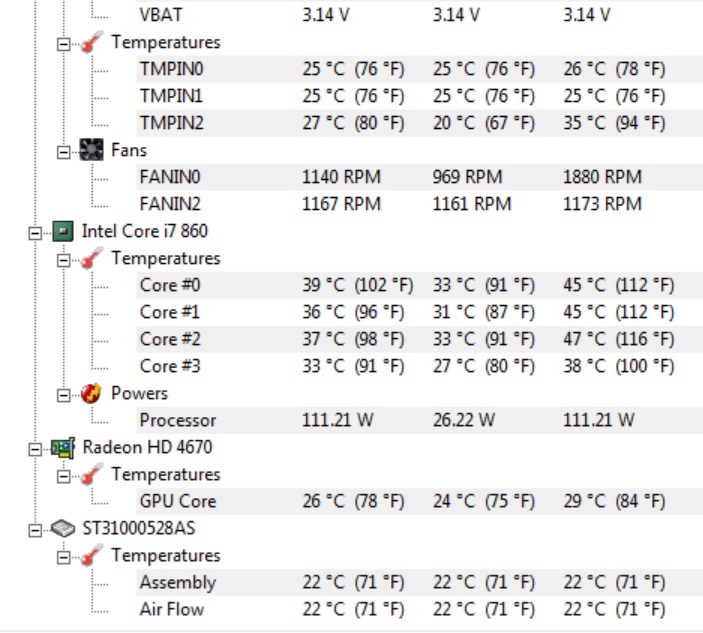
This is recorded when everything in the core features set to auto. The CPU fan runs higher, temperature runs higher, and power consumption is constant @ over 100watts.
OK, we only run applications that are important to us and we see the big improvement from AMDx2 5600 we have running our HTPC.
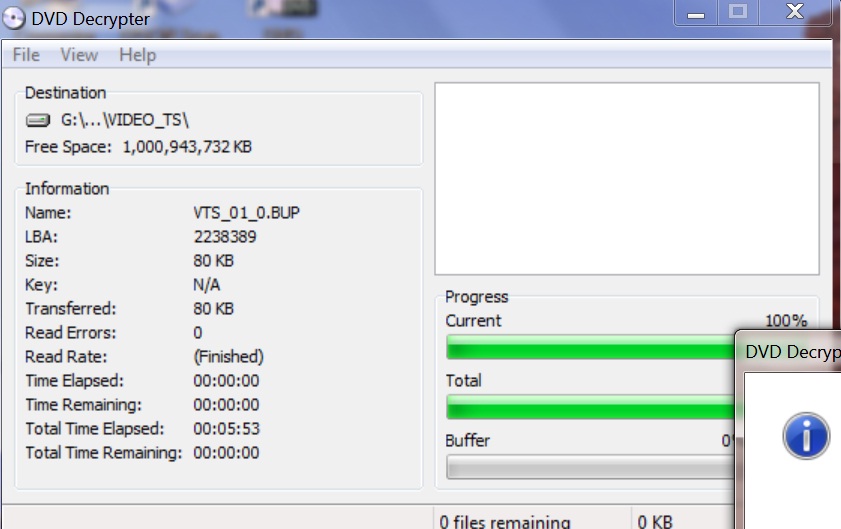
DVD Decrypter (we use our orginal dvd), it only runs on 4 thread and cpu usage is minimal, that’s why i5 would be efficient for this type of application.

It finished the full dvd in ~6 minutes. If any 4GHz machine can do much better than this than show me. The movie is A perfect murder.
Itunes
We took out a SoulLove cd and use itunes to make MP3 songs to computer compress @ 128kbs.

It took less than 2 minutes

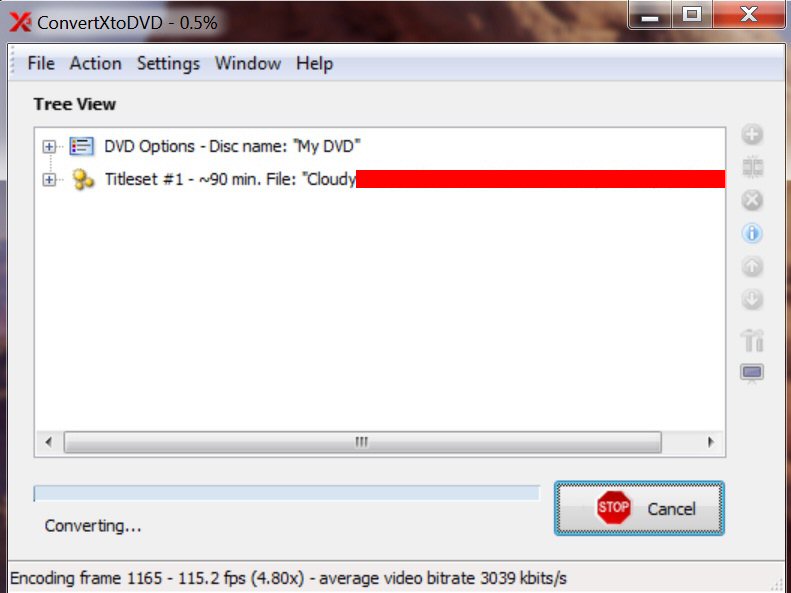
Making DVD from an HD MKV movie
Since we have backed up our blu-ray movies to MKV and our little net-book can’t handle HD format, we have to make DVD (720×480) to play in them. AMDx2 5600 would take more than 1 hour to make one, this one takes 30minutes, more than 1/2 the time. Look at the fps, 115fps, how much faster is 4GHz?

We could clock it higher with higher voltages, but we don’t want to spend money for new CPU cooler, waste more power and not much faster in video encoding.
.JPG)
We did tested with our i7-920 @ 4Ghz, the difference between these applications are minimal. We believe Extreme OC thing is an EGO thing, not much in productivity, and everyone has their egos over their logical heads, but that’s life. We’re happy with 3.52GHz, solid and serve our purposes and the important thing is someone is extremely happy this Xmas, if not, well, que sera sera.
Cheers,
idog