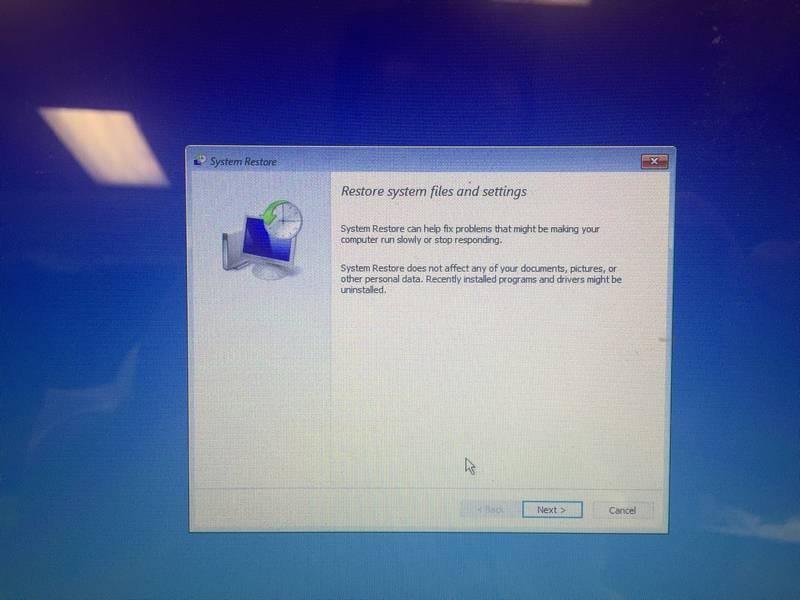
If you use Windows OS, especially Windows 10, you need to create a system restore point when your system is working perfectly so you can restore to that condition when something causes the system fail to boot which happens often with Windows 10 lengthy bad updates.
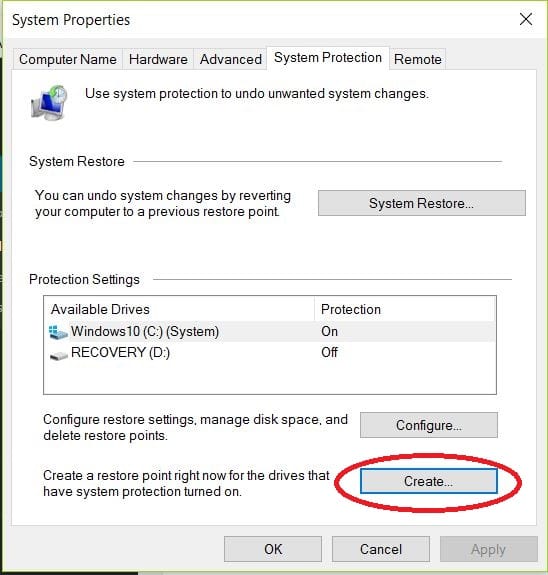
- Go to Control Panel/System and Security/System.
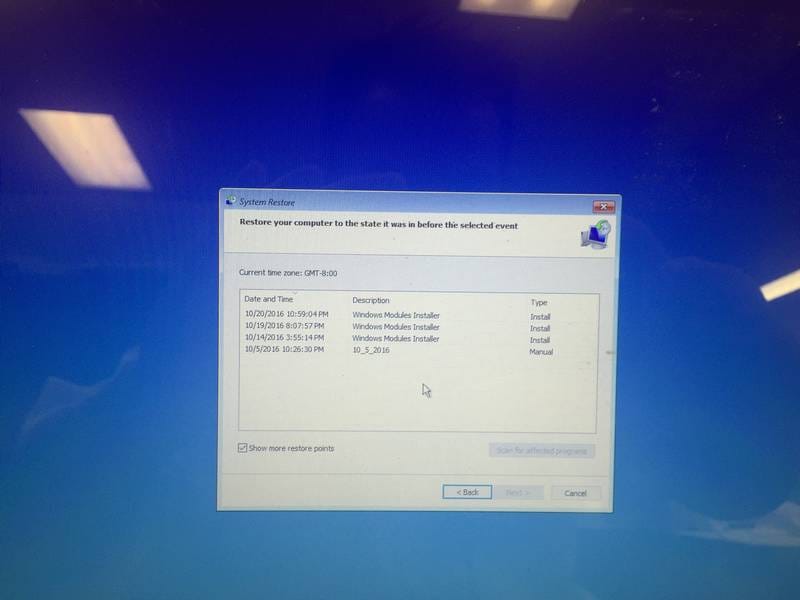
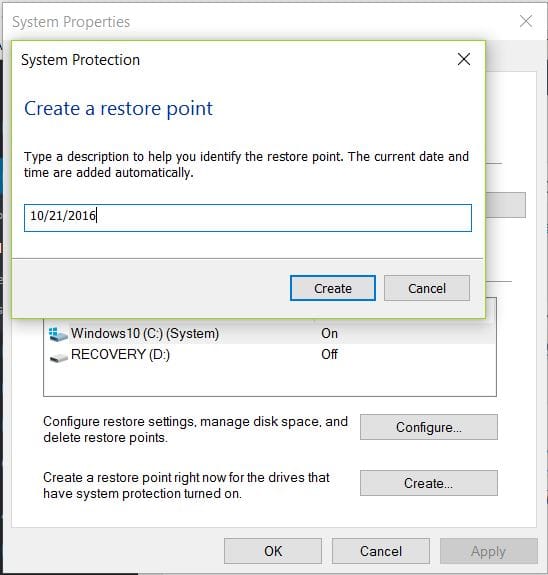
- Select System Protection, it will create a restore point automatically, but we want to give it a date or name, then select “Create”
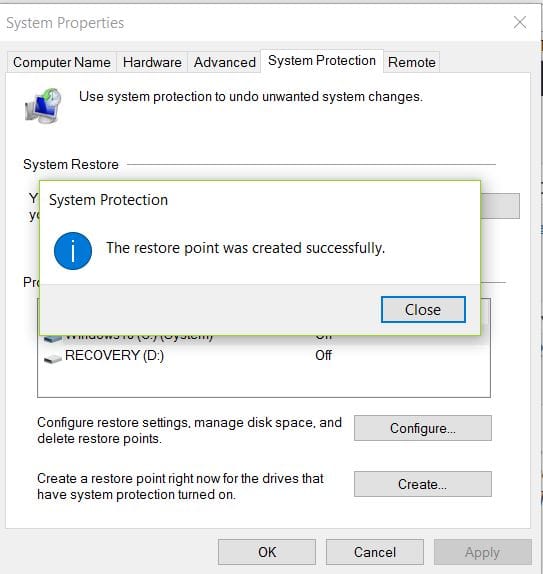
- Enter a name or date then enter, it will create a restore point with the specific name.

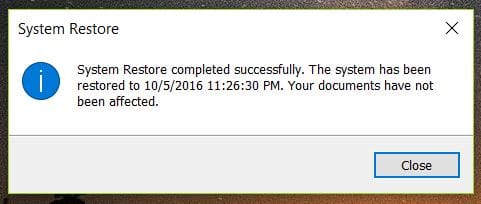
If the computer no longer boot to Windows, we can use a USB installer disk to boot it from and select advanced option to restore to the restore point we created. Make sure the laptop is plugged in because it may take up to 1 hour. When it’s done, it will warn the restore process failed, but when we click OK, it will boot successfully and show it’s done successfully. It’s Windows for you.