
Times are tough these days for people in US, especially in CA, the nanny state. My older sister felt the pinch, called me out of the blue to ask if I can replace rear brakes for her 99 Mitsubishi Montero 3.5L and a few belts for the engine also. Well, if I can change brakes on Audis, I can change brakes on any car, but only Disc system, not these cheap drums from most Japanese cheaper cars. Japanese cars these days are not cheap, they’re just being cheap to maximize their profit, I remembered my wife’s $22k 1997 Honda Accord LX still have the rear drum brakes.
These Mitsubishi Montero 3.5L has 3 accessory belts (what a design beside all their cars are bland and ugly- no wonder they’re almost out of business). The rear brakes have these dinky little metal taps for wear indicator that broke off sometimes ago and it cost $28k in 1999 (can’t even get electrical indicator). Ordered from my favorite place on line autohaus of arizona, they sent quickly but the pads were wrong, I had to go to Autozone next to our home and get one, I was surprised, semi-metalic life time warranty for $23 and I paid $33 on line? Well, I got the RMA extremely quickly from autohaus but I have to pay shipping. Anyhow, check Autozone before ordering on line stuff for Japanese cars. Anyhow, let’s get to work.
Make sure all front wheels are blocked from moving forward or backward with wheels blocks before doing anything.


use any screw driver or the tool from the car to remove the big wheel center cover. There is a little slot on the cover body to stick the flat screw driver to and pry it out.


I believe 21mm socket is the one for the wheel lugs.

Loosen the lugs a little before jacking up the car.


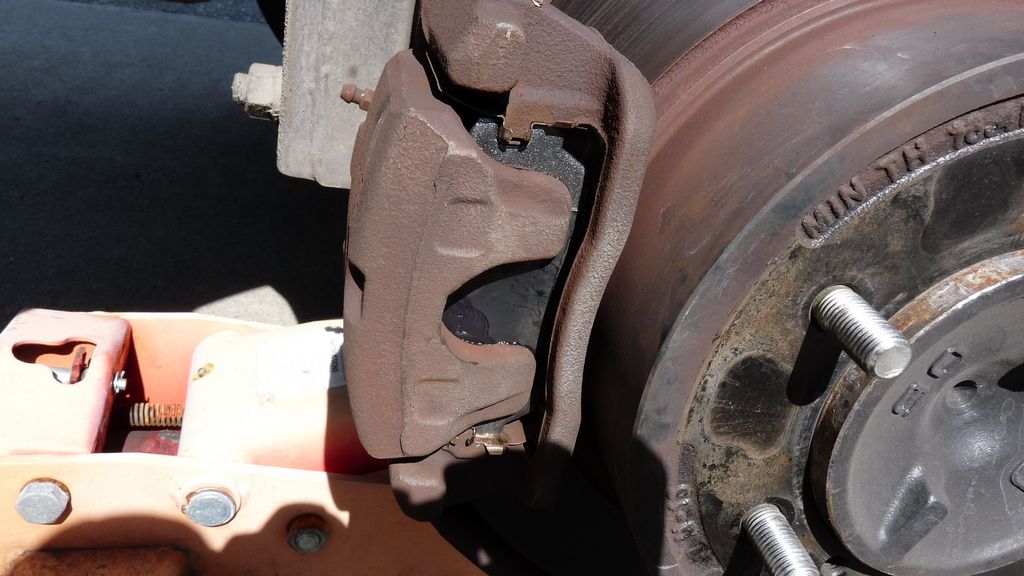
All we need is a 14mm box wrench and a socket to remove 1 of 2 bolts securing the piston housing.


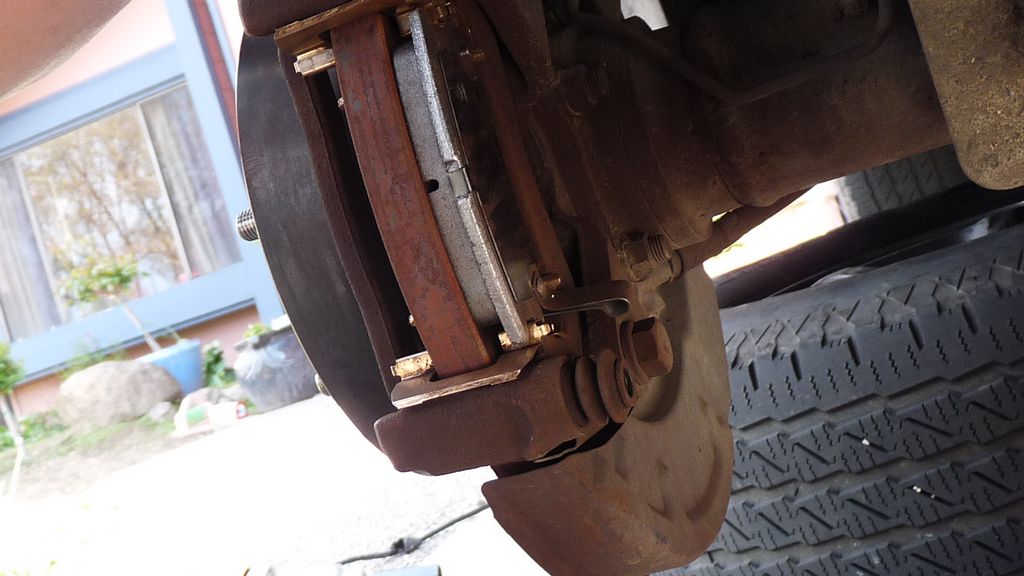
Lift the piston housing to remove the pads. Check the disc for wear and grooves, this disc is still perfect.

The piston is extended out a lot, we need to compress it back in using a compression tool or a c-clamp for thicker new pads.


When the piston is completely pushed in (slowly and carefully), place the inner pad first with indicator facing down, by the way, clean all the dust.


put back the bolt and make sure the rubber booth are in between the housing and the chassis,

tighten the bolt to specs, I just use my feel. Put back the wheel, lugs and tighten them, lower the jack, retighten the wheel lugs again, put back the center wheel cover and move to the next one.

I had a free lunch from my beloved older sister and she said they’re going to charge her $325 for the job, by the way, the belts were fine, we didn’t have to replace any, the shop recommended to replace one for $125. Anyhow, my sister used to go to the shop and tell them “please check and replace what’s needed?”. What? That was then… now, get the recommendation on paper and open the darn eyes to check what they check, unless you’re blind or have too much money and don’t know what to do with it. Gas today is $4.-$4.35 a gallon and my sister’s car doesn’t worth more than $4000 on the open market, doing maintenance for hundreds or thousands on this car is ridiculous.
Cheers,
idog
1 Trackback or Pingback