
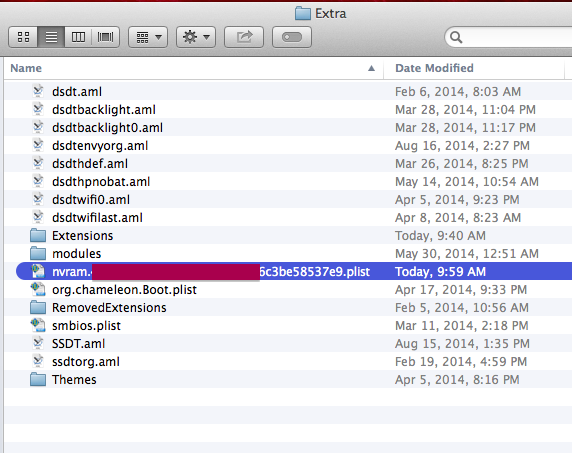
Make sure to run chameleon boot loader with NVRAM option to get the SystemId – then put it in the Clover config.plist for the iMessage and FaceTime to work. If not, you will get the “Validation code error”.


Dual boot installation on HP Envy 4-1115dx touchsmart ultrabook
I installed a dual boot Windows 8.1 and Mavericks 10.9.4 on an original HP Envy 4-1115dx (touch screen) without modifying any original partitions from HP. NO re-installing Windows 8.1 or formatting hard drive. This way can be used for any supported laptop using UEFI. Make sure to follow exactly what I did and make sure your recovery system is still working in case you need to get back to original Windows 8.x. Since we don’t erase or delete any partitions, everything should works as normal. Again – I’m not responsible for anything happens to your laptops or computer.
Someone asked me how to dual boot Windows laptops with UEFI boot scheme. Most of the new Windows 8.x laptops these days have UEFI boot loader scheme on them, to dual boot Windows 8.x and Mac OSX Mavericks 10.9.x (the current one is 10.9.4) in UEFI, we need Clover bootloader since the reliable and robust Chameleon only works in MBR and NOT GUID partition table like UEFI (EFI) in Windows 8.x. I had a tutorial on Dual, Triple Booting on MBR (by pass the UEFI) on my Envy 4-1117nr Ivy Bridge HD4000. Clover bootloader is a great bootloader for UEFI booting, although the documentation is not very clear, I read and experiment with it until I found the solution for my UEFI laptop. It works quite well and it’s actually simple to set up. This tutorial is from the beginning to end – again – do it with your own risks – create a recovery disk before doing anything. Things you must have if you don’t have any Mac to do it with (yes, you can install mavericks without a working MAC) – But you have to find a Mavericks 10.9.x app or InstallESD.dmg somewhere on the internet because you can’t download the free Mavericks 10.9.4.app from the Apple Apps store without a Mac computer. Below are the outline of what needs to be done to have dual booting Windows 8.1 and Mavericks 10.9.4.
Must have: 1 USB external hard drive (250GB, 500GB or 1TB very inexpensive these days: WD 500 GB WD Elements Portable USB 3.0 Hard Drive Storage (WDBUZG5000ABK-NESN)), if you don’t have a working MAC, you need 3 USB flash drives: 2 x 2GBs:Verbatim 2 GB USB 2.0 Flash Drive, Blue 97086
, and 1 x 8GB:SanDisk Cruzer 8GB USB 2.0 Flash Drive, Frustration-Free Packaging- SDCZ36-008G-AFFP
, 1 External USB DVD drive:LG Electronics 8X USB 2.0 Ultra Slim Portable DVD+/-RW External Drive with M-DISC Support, Retail (Black) GP60NB50
, gparted live CD and software.
[title]1. Create Mavericks 10.9.4 Installation USB Drive Without Mac[/title][body]
Please watch the video from the beginning to end, don’t miss any steps: software required for this – 7-Zip, BootDiskUtility.exe, Chameleon_BS, Transmac, idogclover14.zip, idogchameleon14.zip.
Create Mavericks 10.9.4 Installation USB Drive with either Clover or Chameleon Bootloader.
[/body]
[title1]2. Install Mavericks 10.9.4 To External USB Drive for Restoration and Back up[/title1][body1]
Since I couldn’t seem to get Clover bootloader to see my external USB hard drive, I have to create a USB Chameleon bootloader to load and install Mavericks onto the drive. This one must be partition to GUID for Mavericks to load. Make it into a perfect running Mavericks on your computer, laptop before restore it to the internal hard drive (Laptop hardrive). I’ll make a new one this weekend.
PREPARE EXTERNAL USB HARD DRIVE FOR MAVERICKS
[/body1]
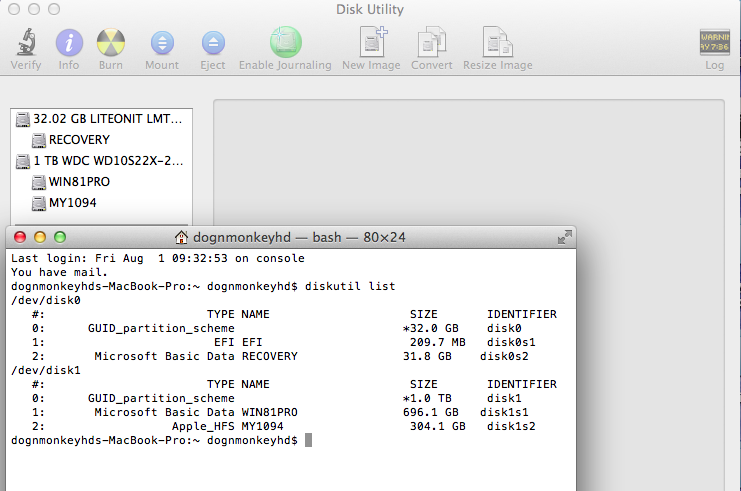
[title2]3. Use Gparted Live CD To Shrink Windows 8.1 Partition For Mac[/title2][body2]
When we already have a working Mac on our External USB hard drive, we’re ready to restore it to the Internal hard drive (Windows 8.1). Now, if we shrink a partition using Windows 8.1, the partition created by Windows file system causes error “not enough space” when Diskutility tries to format to “Mac OSX Extended (Journal)”, if we can’t format it, we can’t install Mavericks 10.9.4. Gparted can shrink a partition and format it for us to “HFS+” which can be used to restore or install Mac OSX. I like to restore than install new one because I know my working Mavericks on external hard drive is working perfectly. I’ll have a video on this one this weekend also.
[/body2]
[title3]4. Restore working Mavericks 10.9.4 partition from external USB to newly created Shrunk HFS+ partition with gparted live CD[/title3][body3]
After we have an internal HFS+ partition for MAC OS, created and formatted by gparted live CD, we need to boot with one of our basesystem installer USB – just like how we created our 8GB basystem – boot with one and restore with the other – this time we restore the Mavericks partition from External USB to internal hard drive. Even after we restore the partition, we can only boot into it with either USB Clover bootloader or Chameleon we created, otherwise, the laptop still boots in Windows 8.x through UEFI. We haven’t modify the EFI folder yet. I’ll have video on this one.
[/body3]
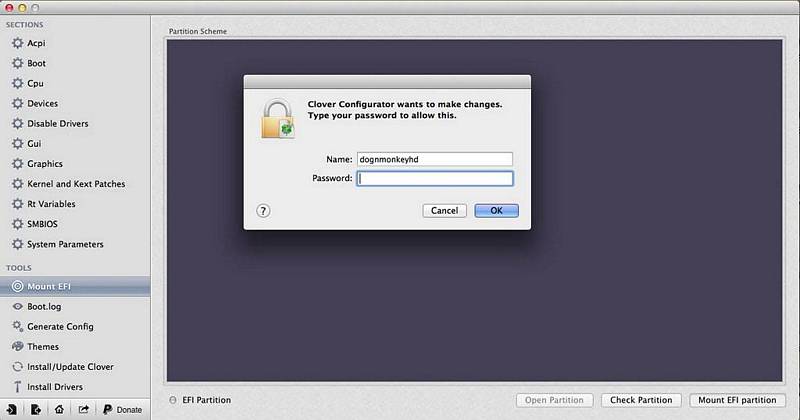
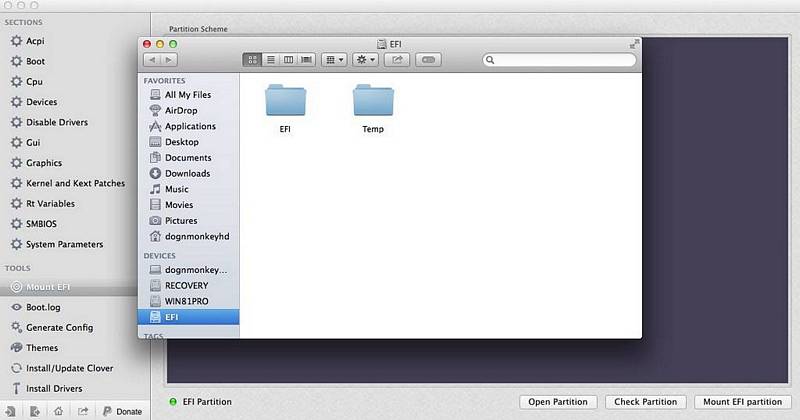
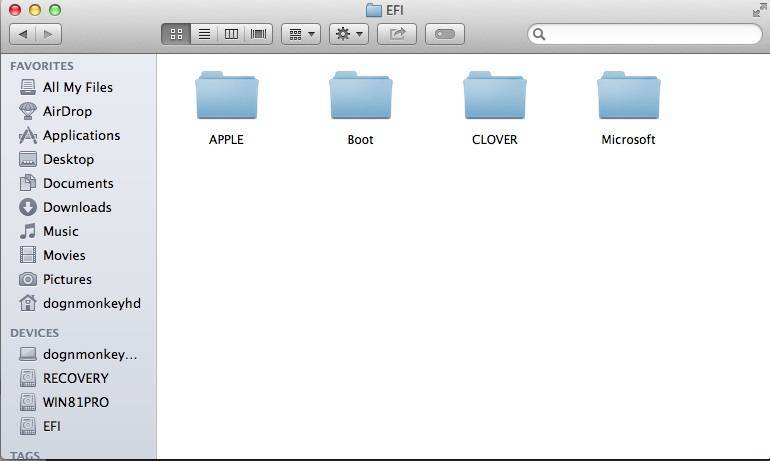
[title4]5. Install Clover to EFI Folder and Set Up Dual Booting[/title4][body4]
We will need to modify the EFI folder (hidden) by using Clover Configurator. Copy the content of “CLOVER” EFI folder to Windows EFI folder. Copy “EFI/CLOVER/CLOVERX64.efi” to Windows “EFI/Microsoft/Boot/” folder.

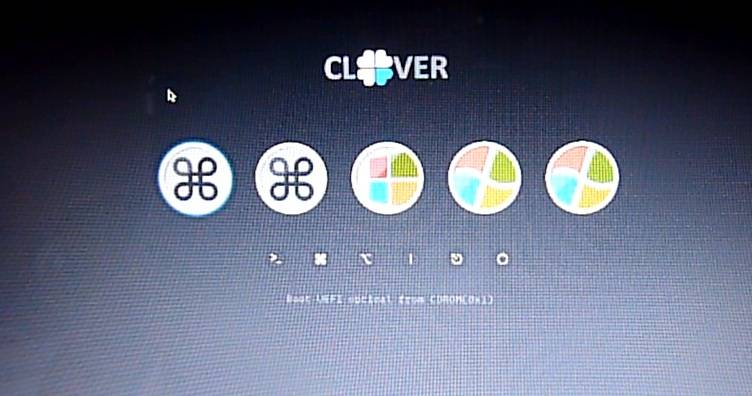
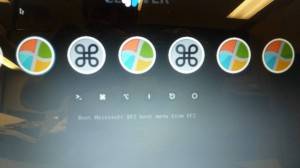
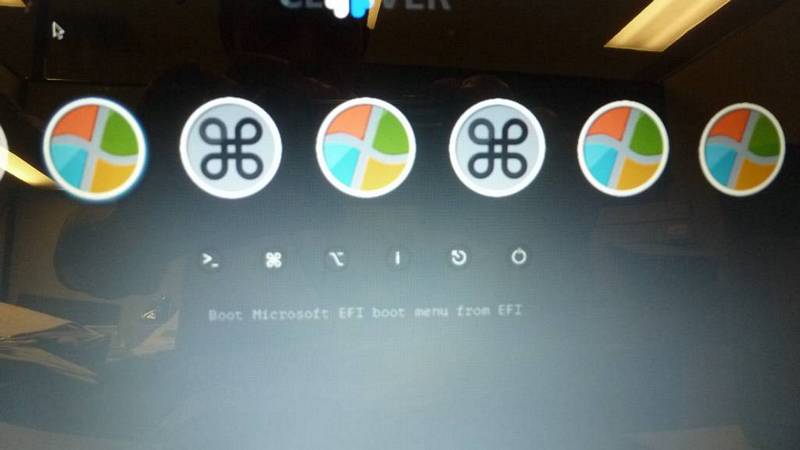
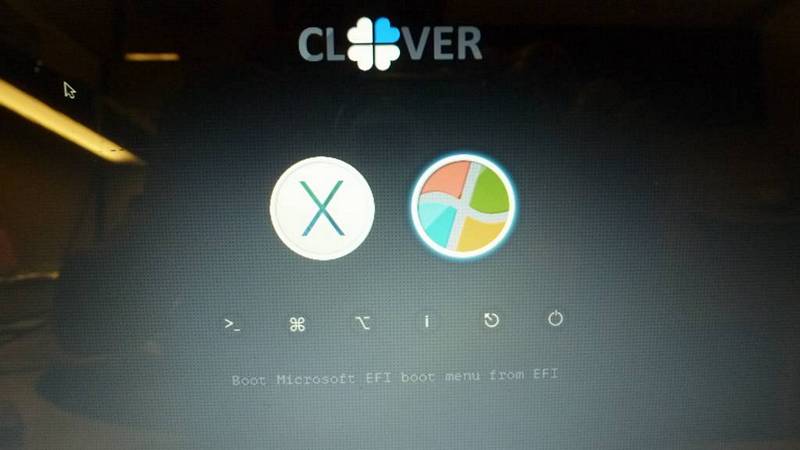
Now, there are 2 ways to dual boot Clover to access Mavericks 10.9.4 partition and Windows 8.1
A. Boot normally in Windows 8.1 and use F9 or F12 dependent upon your laptop to load the bootmanager menu from BIOS. When the bios boot devices shows up, select “Clover OS X Boot” to get the Clover boot menu, then select the Mavericks Partition to boot. This way, the Mavericks is hidden, it’s easier to boot to external USB flash drive chameleon bootloader when needed.

B. Rename EFI/Microsoft/Boot/bootmgfw.efi to bootmgfwwindows.efi and rename the loaded CLOVERX64.efi to bootmgfw.efi.
What this does is when the laptop is booted, it will boot renamed CLOVERX64.efi instead of the original bootmgfw.efi. To default boot Windows 8.1 from Clover menu, we have to edit config.plist in the CLOVER folder with the full path /efi/microsoft/boot/bootmgfwwindows.efi (this is the original bootmgfw.efi) to the Boot section.
<key>DefaultVolume</key>
<string>EFI</string>
<string>/EFI/Microsoft/Boot/bootmgfwwindows.efi</string>
If we only want to display 2 icons Mavericks and Windows only, then we need to add these lines to the GUI section in config.plist: WIN81PRO is my windows partition name and 32GB SSD is RECOVERY.
<key>hide</key>
<array>
<string>WIN81PRO</string>
<string>RECOVERY</string>
<string>System Reserved</string>
</array><key>Custom</key>
<dict>
<key>Entries</key>
<array>
<dict>
<key>FullTitle</key>
<string>System Reserved</string>
<key>Hidden</key>
<true/>
<key>Disabled</key>
<true/>
<key>Type</key>
<string>Other</string>
</dict>
</array>
</dict>
Only use B way if you’re done with everything, the reason is the system always boot into Clover menu even if we hit F9 or F12 to get the bios bootmanager menu.
[/body4]
[title5]6. Content Of Clover Folder In The EFI Partition[/title5][body5]
This is a very important step – to set everything correctly – I use the USB clover boot to make sure everything works before I copy the CLOVER folder to the EFI folder. Now, I don’t have to use the Clover installer to install anything for me, everything is files copying. This is why I keep reminding people that the External USB hard drive with Chameleon bootloader MUST be created and working before restoring it to the Internal hard drive, because if something goes wrong with CLOVER bootloader, we can always boot with Chameleon and access our Mavericks Internal partition. MAKE SURE YOUR EXTERNAL USB MAVERICKS HARD DRIVE IS BOOTABLE WITH BIOS BOOT MANAGER.
There are tons of tutorials about clover bootloader and options and stuff. I only use some that work with all my laptops. Here are my simple set up that works. There are 5 folders in the CLOVER folder that I use and I deleted the “driver-off” folder:
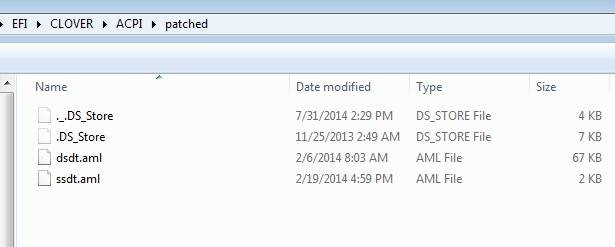
1. ACPI : this folder I put my dsdt.aml and ssdt.aml.
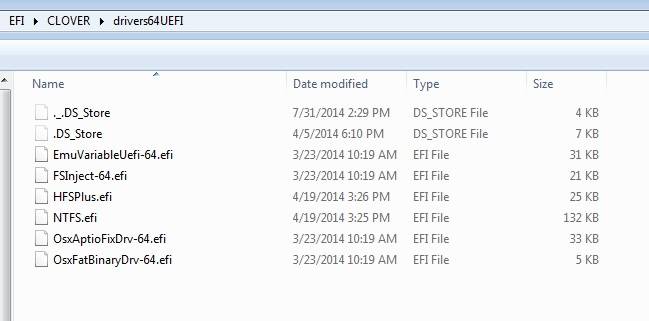
2. drivers64: I put 6 files as below.

3. drivers64UEFI: I put the same 6 files as drivers64 folder.
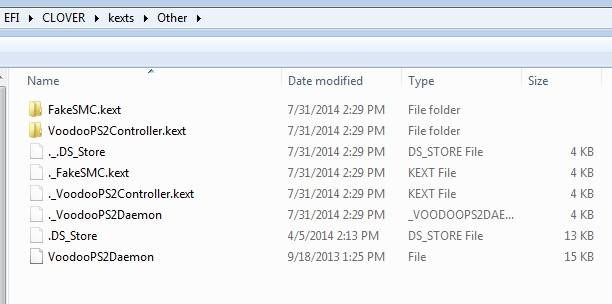
4. kexts folder: I put 2 important files: FakeSMC.kext and VoodooPS2Controller.kext in both “10.9” and “Other”. Since there are no Wifi – Ethernet – Battery Management – etc in these folders, make sure you install all your kexts in the Mavericks USB External hard drive.

5. themes: all the themes in.

And the last one is the config.plist file that works with everything.
[/body5]
12 Comments
i followed your method… mac is working great as i have installed all the kexts but i cannot boot to windows…. i have followed all the instructions that you gave… in clover boot loader now i see boot mac os x from my disk
it loads fine and i see three other disks but none of them loads windows… even clover loader says boot windows from legace hd5, hd6, hd7….
really confused
Windows boot is “boot efi from efi”… Watch the dual boot video closely.
this is by sheer coincidence that i have the same laptop as rohith and would love to install osx on this amazing lap
i have checked with tonymacx86.com and foud out that everything is supported except the processer ,anyway to solve this ?
cheers & thanks in advance !!!!
You could maybe fake the cpuid with clover, just google it!