
When the car is over 100k miles, running hot or low oil for a while, the oil cooler plastic coolant pipe would break and leaks slowly under pressure (when the car turned of after reaching operating temperature). The leaks appear to be from the water pump but it’s not, it’s dripping from behind the alternator which is directly below the oil cooler pipe and water pump. Before we assumed that the water pump is leaking, remove the driver side fan (disconnect the electrical wiring), remove the timing belt cover and run the engine to see if the water pump squirting out coolant.
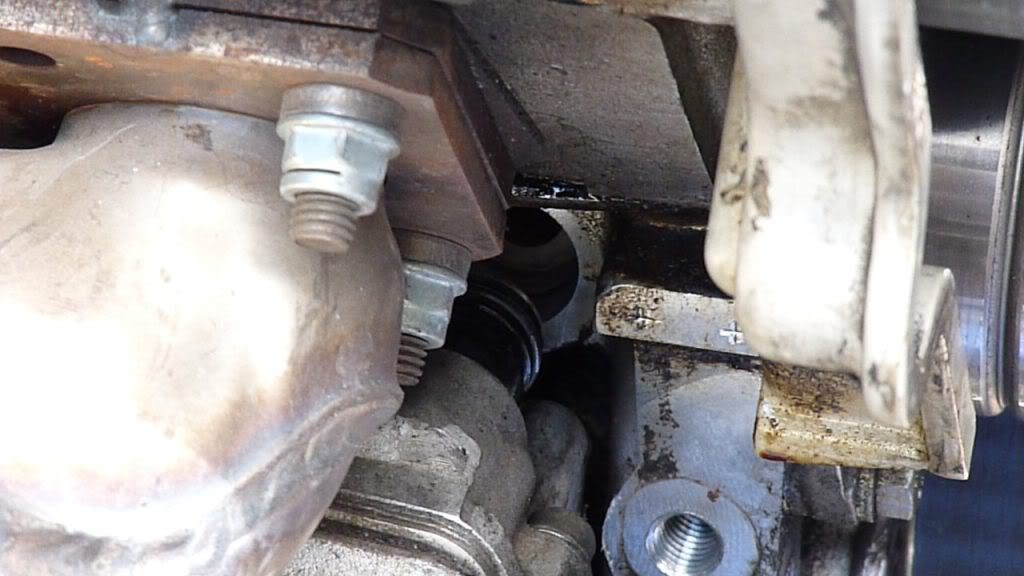
The leaks could be from this black plastic pipe here.
If we’re doing this job without the waterpump or timing belt, we only need to remove the front end, air filter housing, alternator, drain the coolant. Alternator must come out.
Remove front end of 32V A8

We can check the leaks to see if it’s from the water pump by removing the timing belt cover and run the engine to see. On the D2, it may be necessary to remove the fan out of the housing and make sure the electrical cable is DISCONNECTED.
The part is less than $13.00 at the dealer, but the removing and installing the oil cooler is tedious and required some patient and skills.
We removed the timing belt covers to do this. The best is to replace this when changing the timing belt or water pump.
Remove the alternator (www.audipages.com) has good information for this replacement. Drain the oil, remove the oil filter, filter cover, air filter housing, alternator.
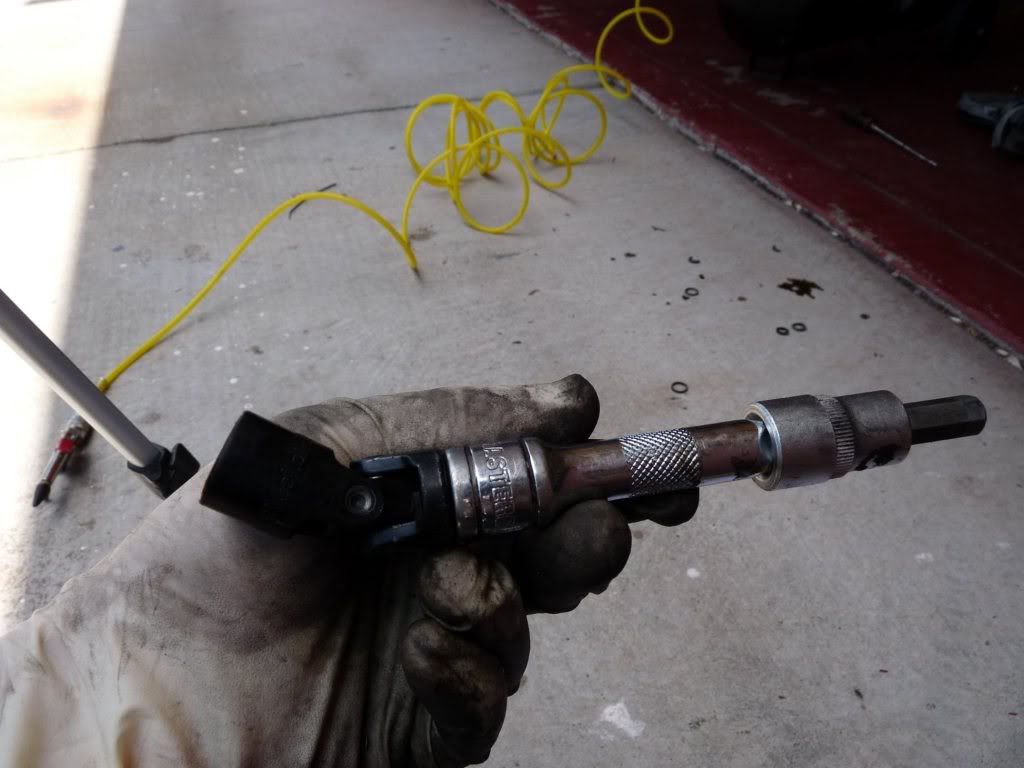
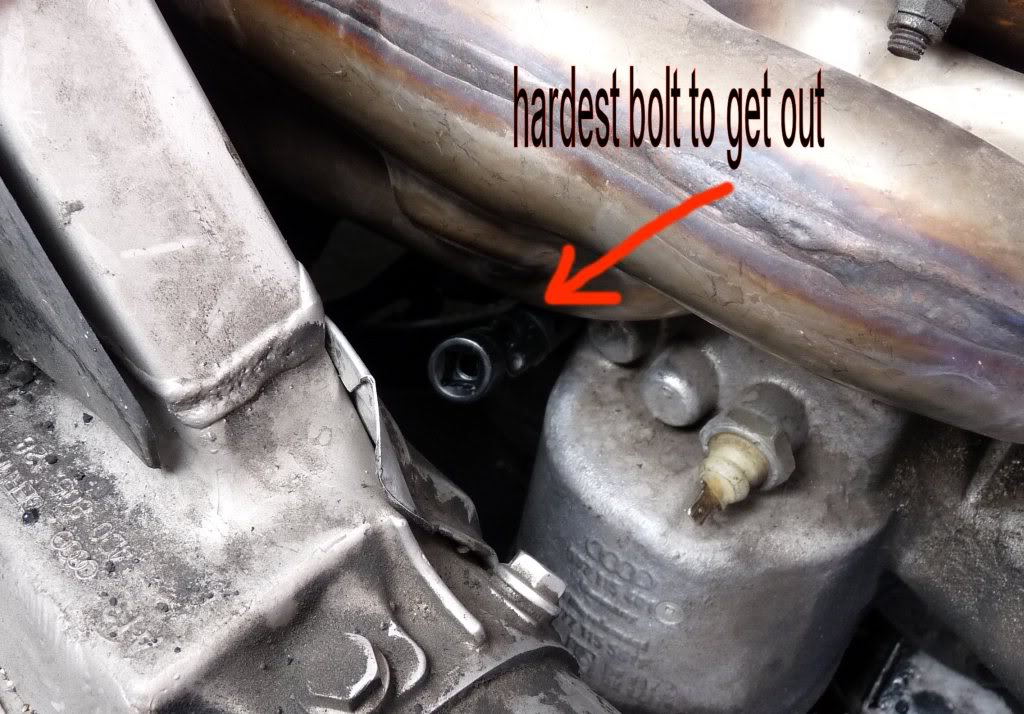
The oil cooler has 5 hex bolts. The hardest bolt is the top far left one looking from the passenger side of the car. Audipage.com recommended to raise the engine up, but we didn’t have to. The bolt is here. The best way to access this bolt is to lie under the car, put the arm around the bumper shock tube with extension and put the hex key in the bolt. When this one is out, the other 4 bolts are easy. The best way to access the hardest bolt is to use the extension like this
The hardest bolt with the extension in placed looking from the top of the car
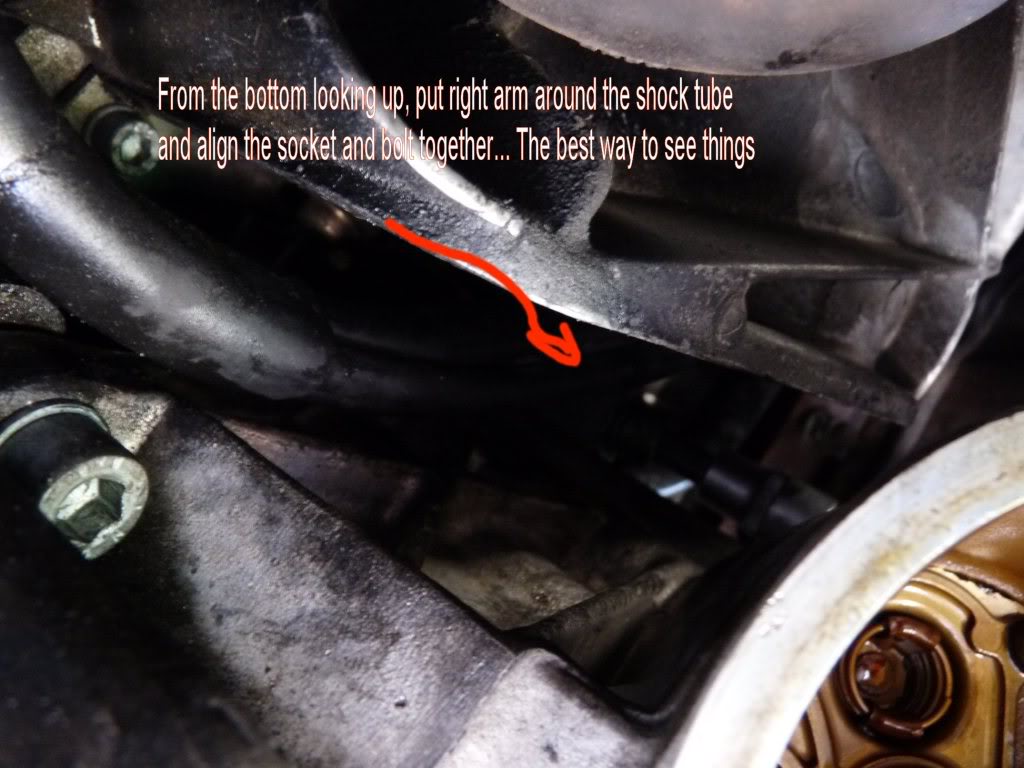
To align the extension to the hardest hex bolt, we need to go under the car, put the arm around the bumper shock tube and push the hex key in the bolt, we should be able to see it very clearly from under the car providing it’s day light or with some lighting.
So, the oil cooler removal is only hard because of the position of the 1 bolt hiding behind the engine. All other bolts are in plain sight and easy to remove. Yes, we have to remove the oil filter, the alternator and yes, it’s best with the front end removed and the timing belt cover is out. The bottom line is when we replace the timing belt, water pump, do this oil cooler thing at the same time. Here is the $13 part that caused the whole mess.
There are total of 5 bolts to remove the oil cooler


There are 2 more bolt, 1 on the right lower on the picture above and one middle top just right of the oil filter housing.
When all 5 bolts are out, notice the short bolts (#3 under the oil filter, top middle right of the oil filter?) and all others should be long. Wiggle the oil cooler out from top and bottom and slide it out toward the front of the car to clear the black coolant metal pipe.

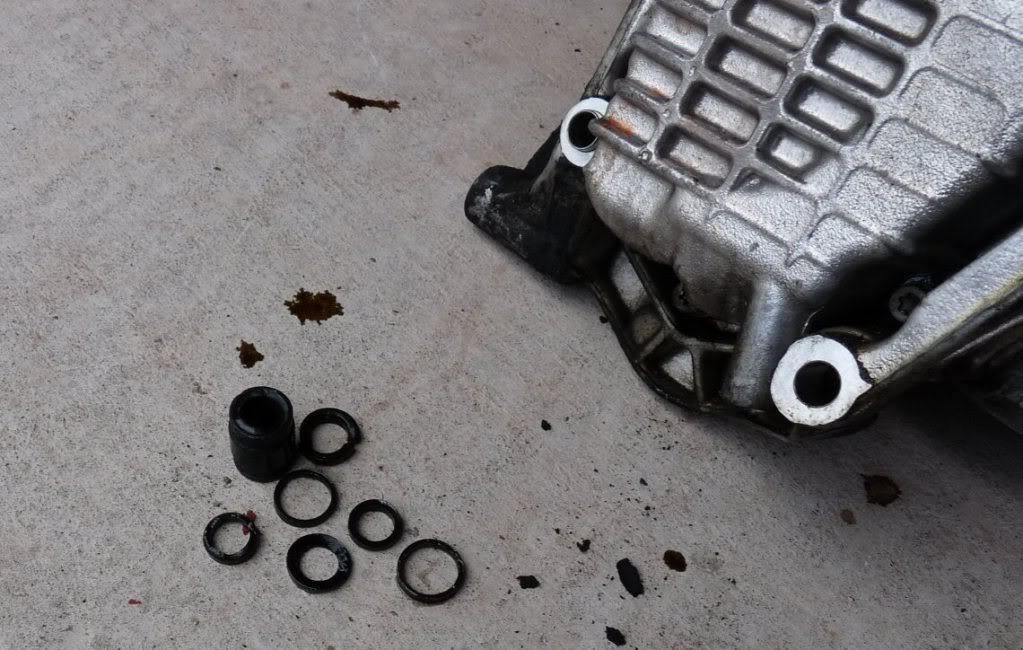
When the cooler is out, we will see the broken plastic pipe on the block and the cooler, we need to remove them to fit a new one.


Clean up the oil cooler and the block surfaces, fit new rings onto the new oil cooler pipe, new ring on the black metal pipe, “8” shape ring and rub some engine oil on them and the oil cooler is ready to be mounted back on. Make sure the aluminum guide cylinders are mounted.

We align the bottom cooler in first, align the hole with the metal pipe to fit it in second, slide it back while rotating the cooler to get it in (engine oil on the metal new ring will help sliding it in easily), next align the plastic pipe to the block, it’s visible from cooler, then slide it in the block hole, then everything will fit nicely (engine oil on the new rings will help sliding it in smoothly).
Tighten all the 5 bolts slowly and securely in diagonal fashion. Don’t forget the correct size of the bolts. Check out the 40V oil cooler for references
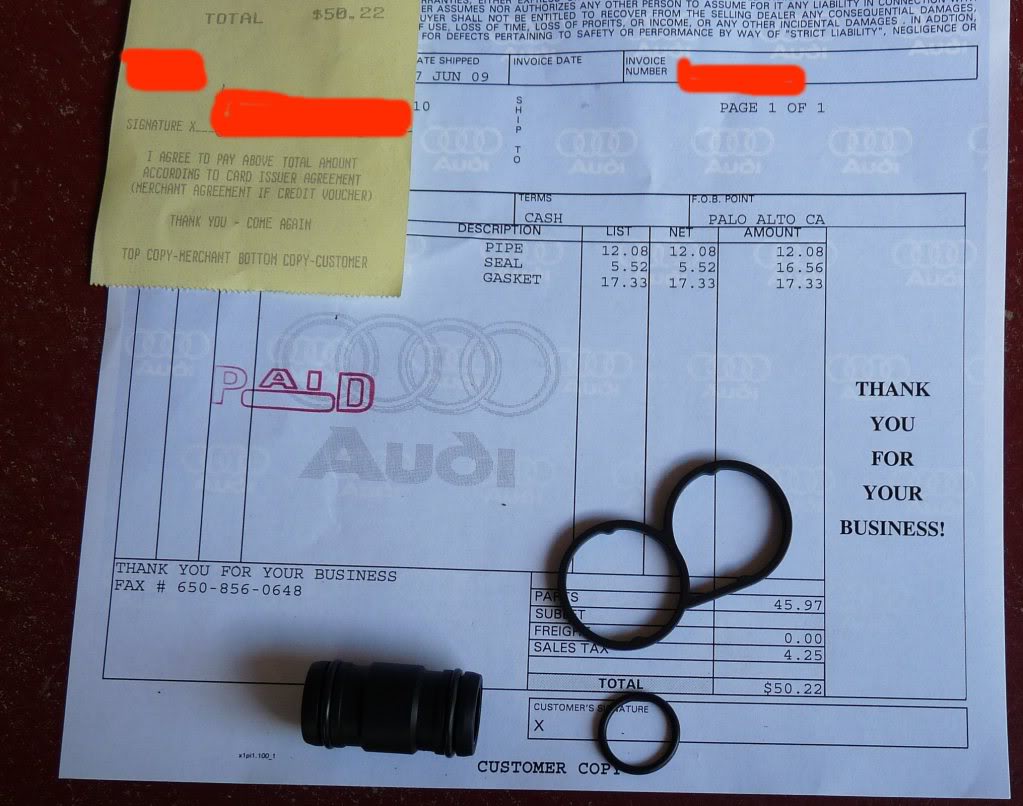
So the cost of the parts

Some dealers like Steven Creek Audi in San Jose did not sell us individual rings, only sell the whole set of rings for oil cooler which will replace all the rings in the cooler which we may not need. If the water doesn’t mix with oil in the engine, then we don’t need to replace all these. Most of the time, the rings are fine, the leaks are due to the broken brittle plastic pipe after over 100k miles with the engine over heated once or twice. Carlson Audi did sell us what we needed.
Cheers,
4 Comments
I’m having a problem with the tranny slipping…2002 A8L Audi with 120k miles…took to the dealer to check… they said they would not recommend a tranny service (oil change) because this could be bad for the tranny…. the tranny slips only when the car warms up…also found the oil cooler lines have a leak…they informed that oil cooler lines are not available anymore..and also a N80 valve and a faulty R/S Cat converter……they told me is not worth fixing….the car is like new I don’t want to get rid of it..
You should go to A8 D2 Forum, people there are very good with this problem. I’m sure with a nice car, it’s hard to part. Don’t replace the trannie oil, it’s a waste, never fix anything, I think it’s the solenoids. Good luck