
2017-06-21 The faucet started to leak – dripping from the spout – called Moen and they sent a cartridge 1222B right away – great customer service. We will receive it in 7 days.
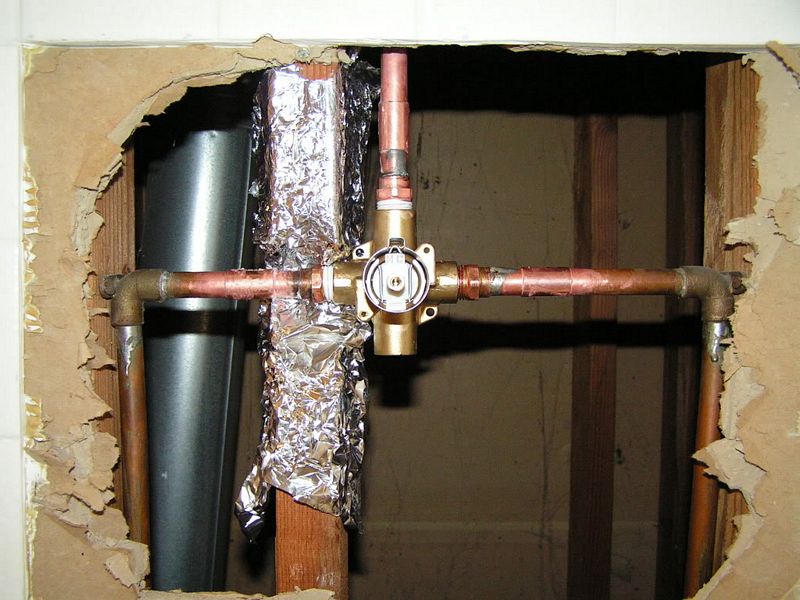
While trying to fix the leak of the kids bathroom, I broke the valve since it’s too old and rusty. I was in shocked, didn’t know what to do since I’ve never had to replace a shower valve before. I didn’t have the new valves and I couldn’t turn on the water. After taking a deep breath and relax a little, I found a way to block the water, silicon, 8mm bolts and C-clamps while deciding on which brand and valve to get (which took about 1 week). The Moen with pressure balancing valve to prevent “Shower Shocks” (when a toilet is flushed or washing machine is on).


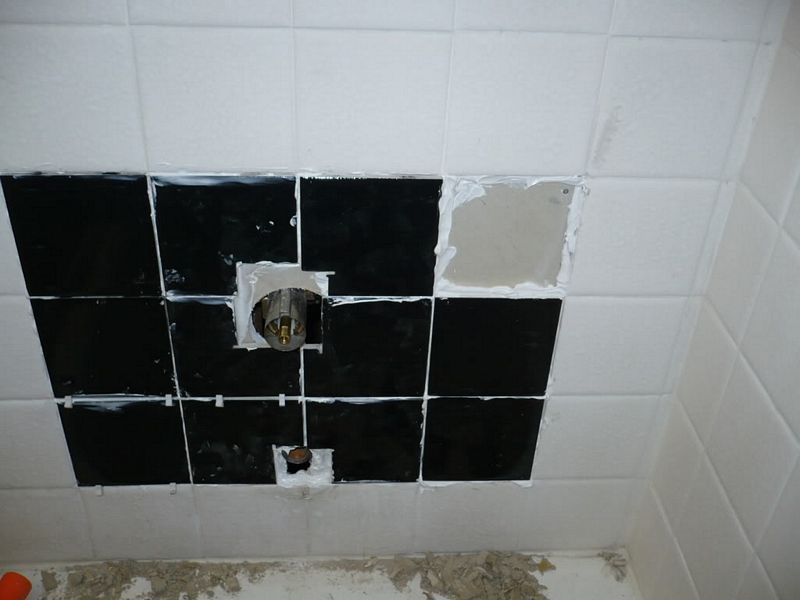
After the silicon is cured, we could remove the C-clamps and have a better view on how big of the area we want to cut away. The goal is to make it big enough to access, cut and join these copper pipes to the new valve and a new cement board for the new tiles. Get out the masonry blade and the angle grinder, cut the grout and hammered away, make sure we covered the tub with cloth or towel so we don’t get any junk to the drain.

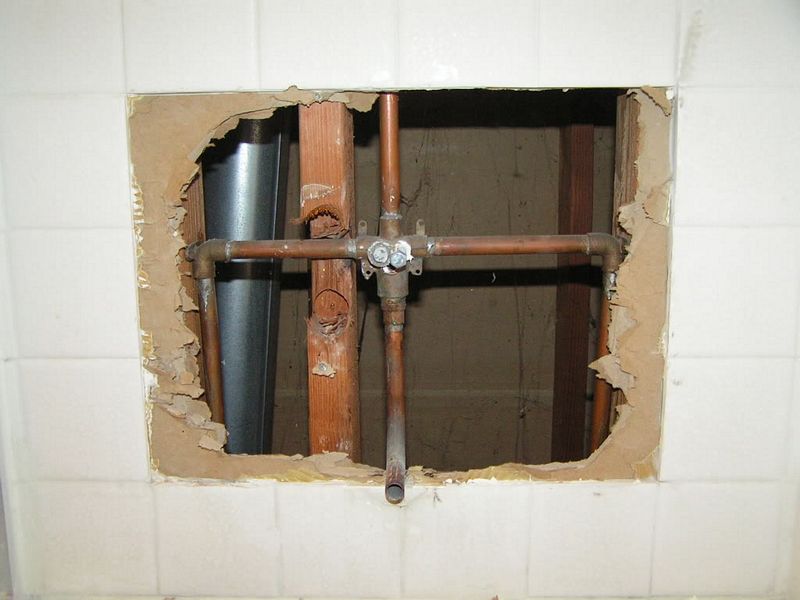
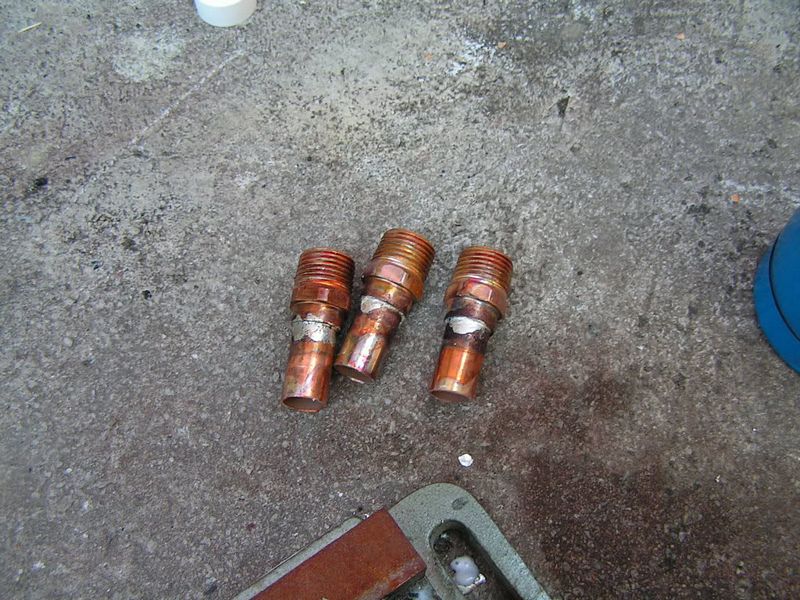
In order to replace with a new valve, we need to remove the old with welded pipe. The original pipes are 1/2″, we held the new valve to the old to estimate how long the extension should be and how much we need to cut off the old pipes. Tools we need are the welded kit, thickest 1/2 pipe, hack saw, copper joints w/o stop (so we can slide it totally through one side), 1/2″ threaded to 1/2″ female pipe connectors, 4 1/2″, 5″ (1/2″) galvanized pipes for the lower spout. We needed 3x 2″ copper pipe extension welded to 3 copper connectors for the new shower valve.


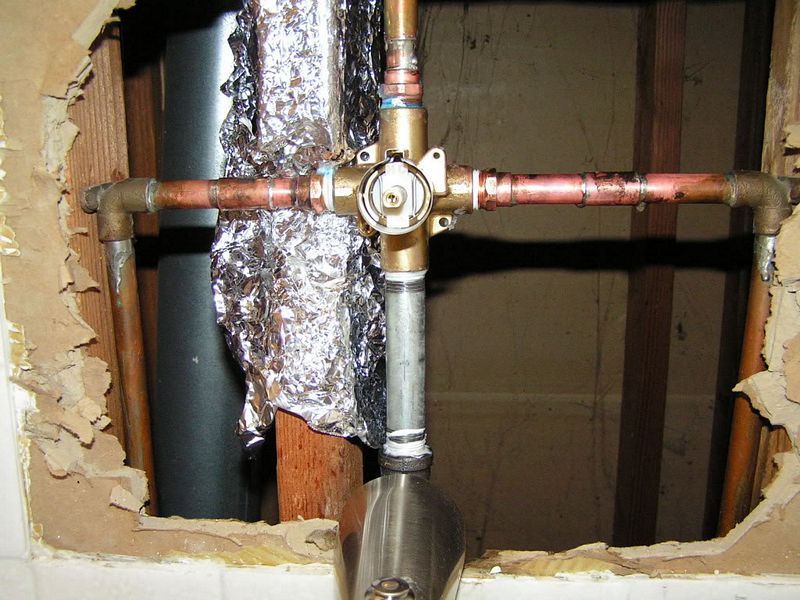
Follow the instruction to the T, SAND the copper edges, brushed generously flux around the pipes and the inside the connector, carefully turn on the torch to blue flame, get the solder ready and fire the connection for a few minutes, hold the flux at the joint and the heat amazingly melted the solder and the flux sucked it in all around the pipe. We didn’t even have to move the solder around. It was a great experience for me. AMAZING!!! Like they said, the first one is the hardest, the other 2 were a piece of cake.

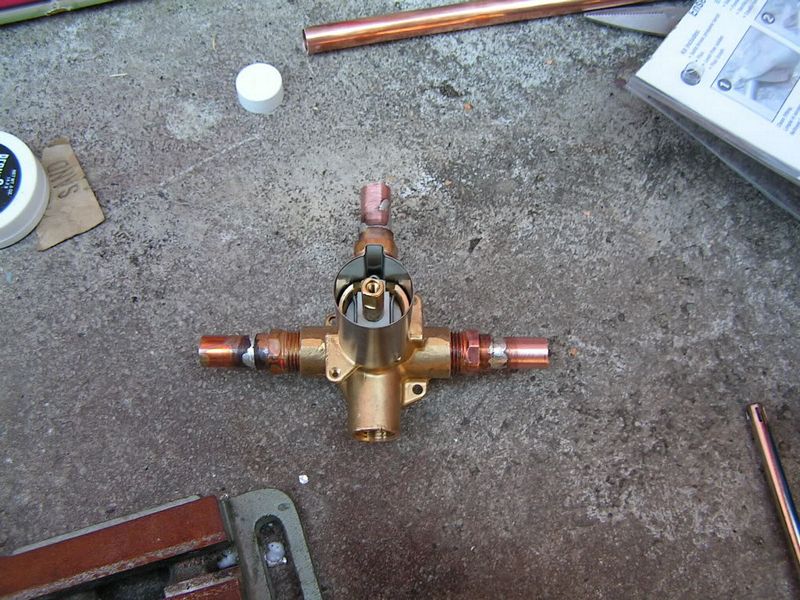
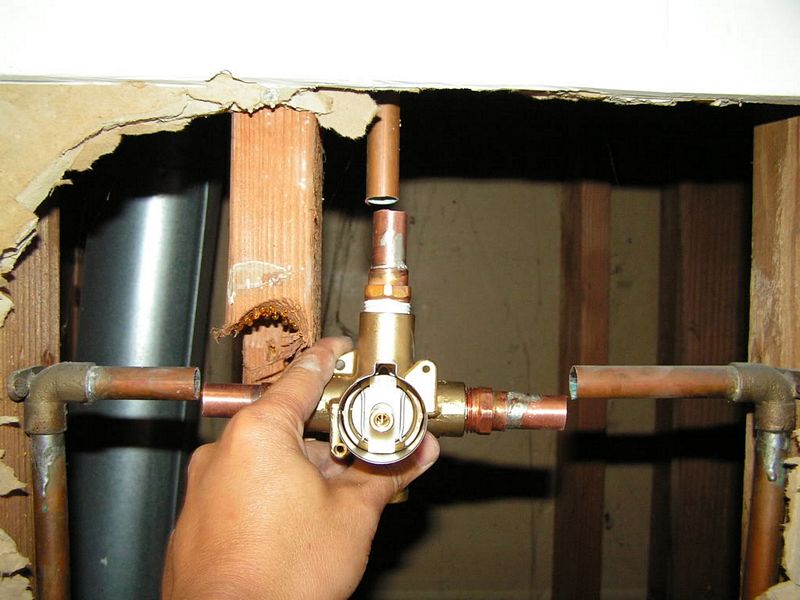
Slide the copper joint w/o stop to the old pipes, SAND the old and new pipe edges, apply flux generously around both new and old pipes to be connected. Set the copper joint to be as center as possible between the new and old pipes. Make sure the position of the new valve is centered through out the TOP, BOTTOM, RIGHT, LEFT, FRONT, BACK (as close to the old valve position as possible). We had to do it 3 times to get it right, the threaded connector must have lots of Teflon tape around the thread and tighten them all the way if not after we welded the connection, the valve leaked at the threaded connector. The second time we tried to weld the connector to the valve body, and it’s not hot enough to melt the solder to the threaded connector. We didn’t want to heat it too much since the warning on the new valve “excessive heat may cause valve malfunction”.Use foil to protect the wood from open flames.
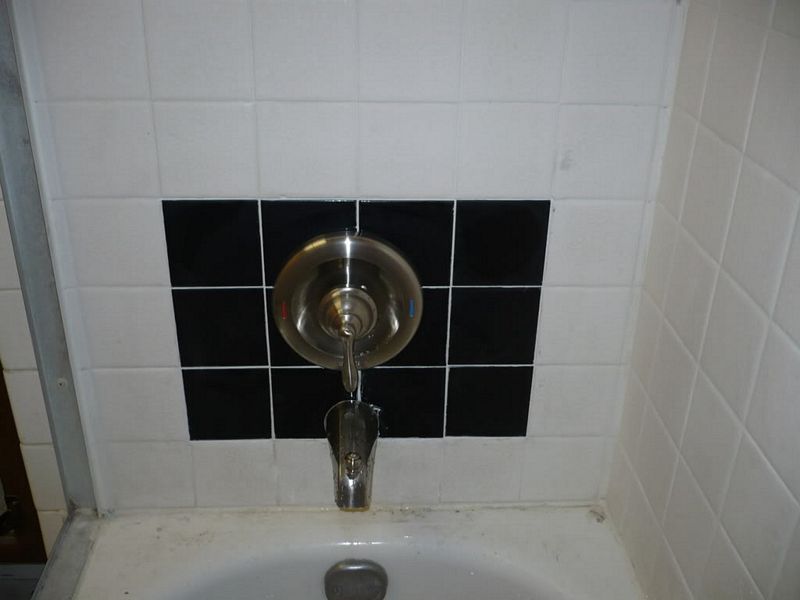
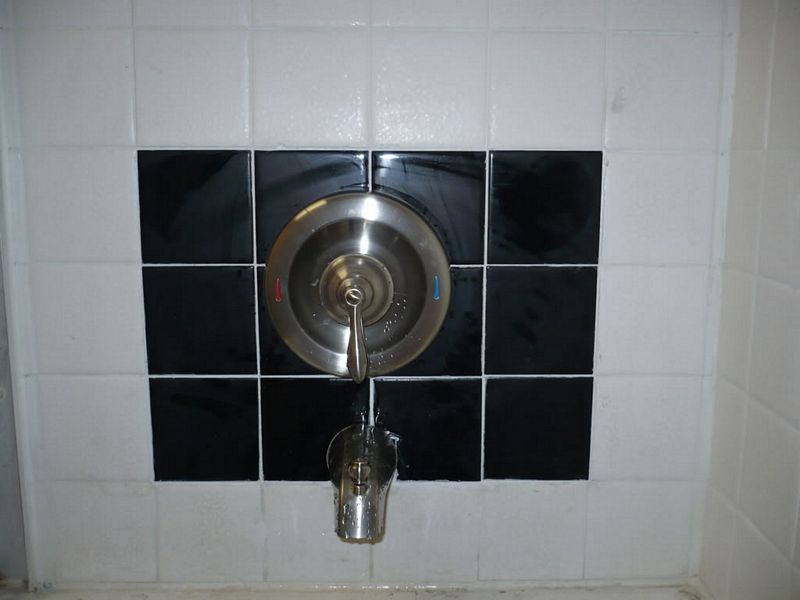
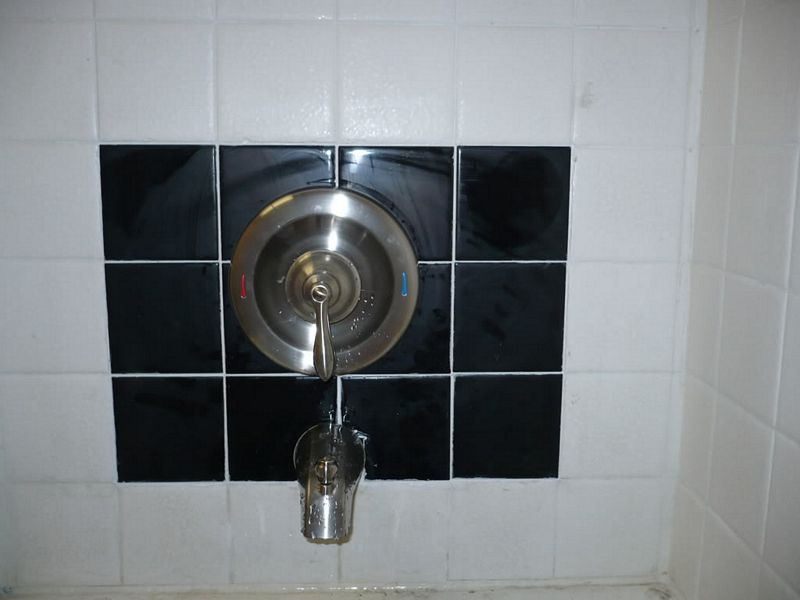
Finally, the moment of truth… installed the shower head, the down spout, go outside of the house, turn on the main water valve, run up stairs and hope you don’t hear water running or squirting anywhere because you’re doing this by yourself while your wife and the kids are at the beach. NO LEAKS, what a relief, turn on the faucet, change shower, NO LEAKS top or bottom. Turn on/off a few times. It’s totally done!!!!Next, the cement board and tiles will be a walk in the park…. We’re planning to change the tub and the tiles later, the original wall was NOT cemented board. We just use a piece of dry wall for now.

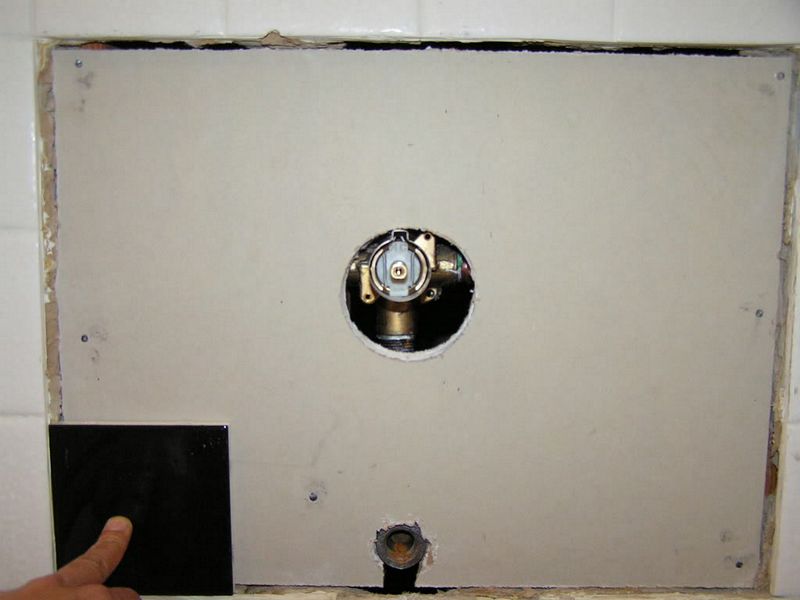
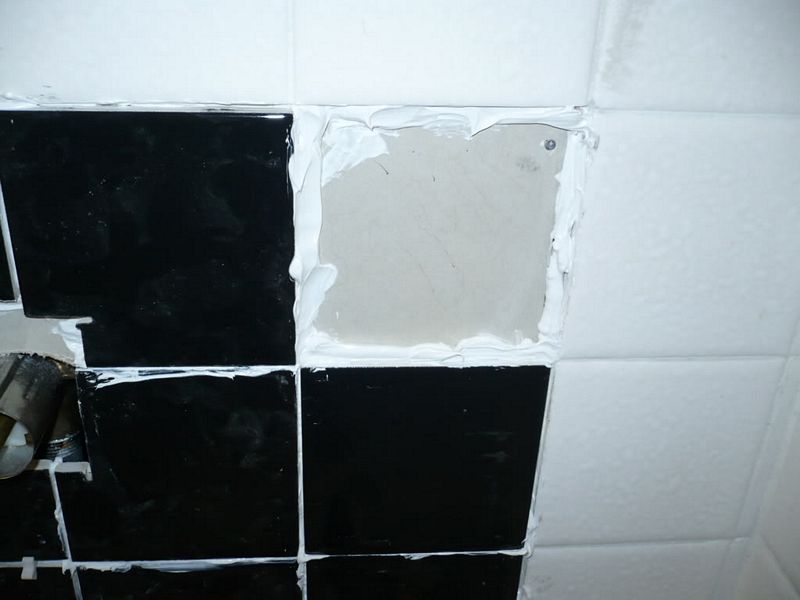
Cut all the tiles for the valve & the spout. Lay them out first then start to use silicon for the edges and mastic for the tiles and lay away.
Moen Shower kit = $142 @ LowesExtension galvanized pipes (2×5″) & copper pipe & join pipe, teflon tape =$20.Plumber welded kit = $20.00Black 4″ tiles = .38 x 15 (3 for spares)Hacksaw/tilecutter/grinder/sand paper/pliers/screw drivers/silicon/mortar/reciprocal saw/chisel/ from other jobs.
August 24, 2008
2 Comments
coupla things:
1. they make repair plates for this type of change over both Smitty and Delta and Moen
so you won’t have black tile with white tile
2. you used a black “90” at the tub spout “Black ” fitting are for “gas only” not water this will leave rust in your water to tub…. should have used “Galvanized” 90
professionals probalby would have used a 1/2″ male adapter and a copper 90 with a “stub out” for the tub spout ( they make adapters which let the tub spout “slip on” the copper pipe.
Thank you.