My brother in-law’s A8 has an overheating problem after the “quick fix” of the oil cooler pipe leaks- He poured the radiator leaks sealer into the coolant in the attempt to seal the leaks-The thermostat stops opening, stuck close. We don’t know if the thermorstat ceased to open on its own or with the help from the sealer-The bottom line is the temperature will operate normally @ 1 mark before the red… Too hot. We decided to check the thermostat and replace the oil cooler plastic pipe at the same time. The oil cooler will be another write-up.
The timing belt is like new, so we don’t want to change it at the moment, but if the timing belt is out, it will be a lot easier to do. The 40V thermostat is behind an aluminum cover (manifold?) and behind the timing belt which makes it extremely hard to replace, unlike the 32V which placed by itself and very easy to replace. Many people did this without removing the front bumper and pull the radiator assembly out to have more room which I think it’s not efficient. It only took less than 30 minutes to remove the bumper and the radiator assemble out to have more room to work on and much easier and actually save more time and pain. The removal of the bumper and the radiator is the same as the 32V I did on my 98 A8 car. BTW, 2000+ A8s have 40V engine.
Removing front end on the 32V
The 2000 A8

The engine with covers that need to be removed, there are slotted screws that need to be twisted 1/2 turns to release and remove.

Remove the bumper and the radiator assembly for easy access. Drain the radiator coolant. If we want to replace the whole coolant, then drain coolant from the block also, check the 32V write up.
Rotate the engine CLOCKWISE until TDC, the mark on the crank match with the mark on the cover. The nut is 24mm 16 point.
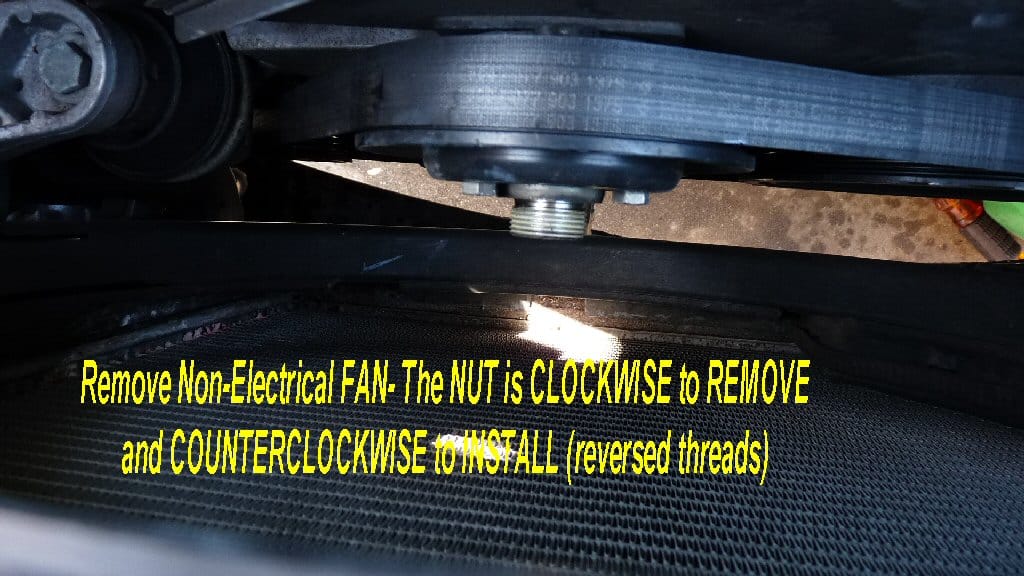
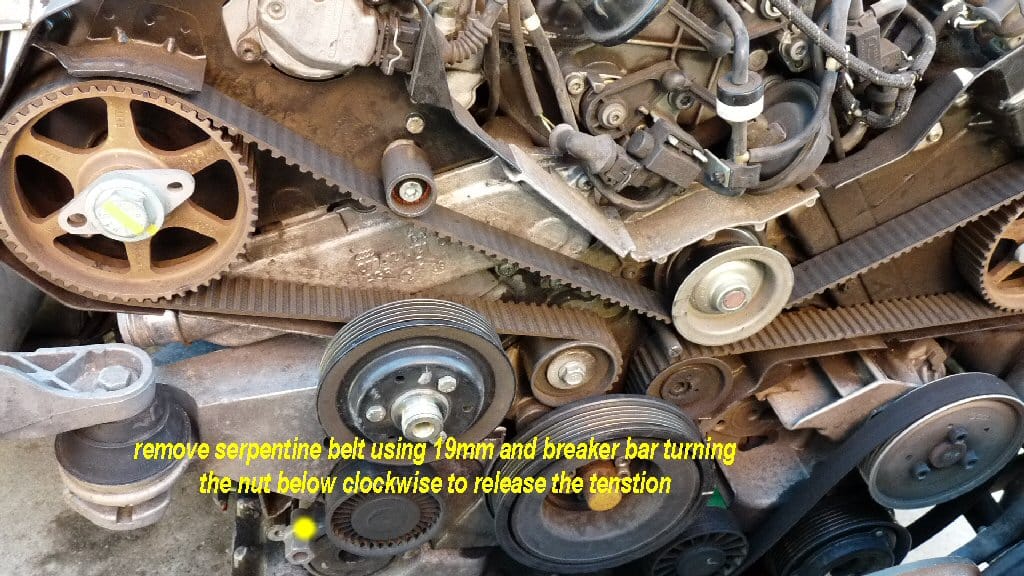
Remove the Non-electrical fan and the serpentine belt-The belt tension can be released by rotating the 19mm bolt clockwise using a breaker bar and socket, it’s also recommended at mark the rotation arrow on the belt if we’re going to use the old belt. The non-electrical fan is reverse threaded, so out=clockwise and in=counter clockwise, use a large crescent wrench for the nut, and 10mm as anchor on 1 of the little bolt, use a hammer to knock at the end of the crescent wrench to open. We don’t have to remove the blades like my old 32V.
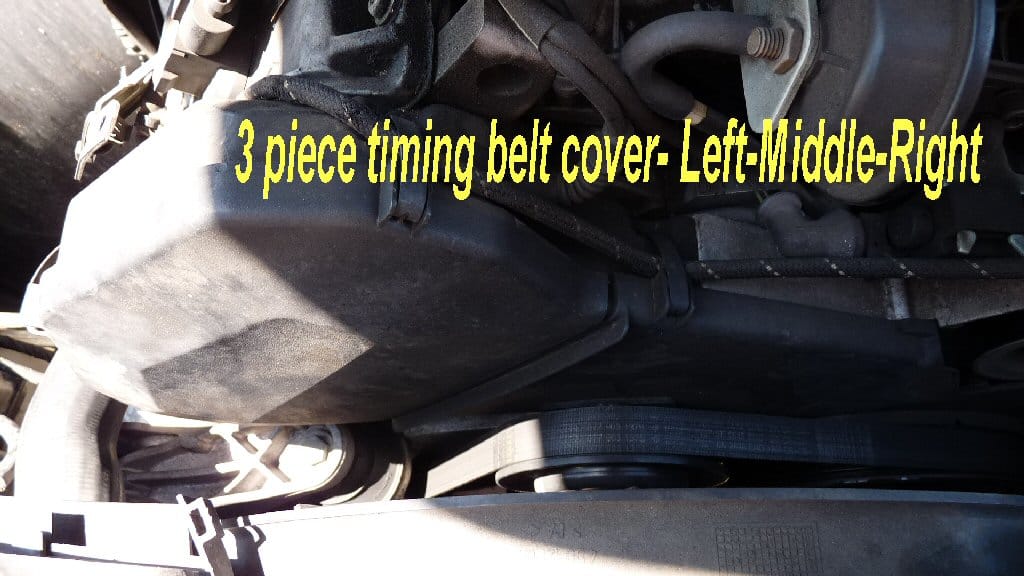
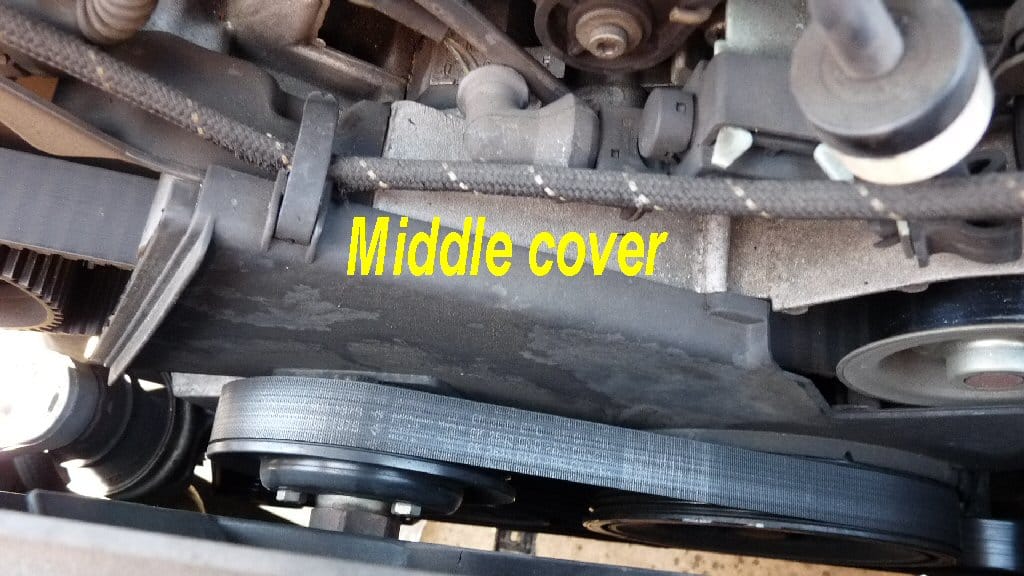
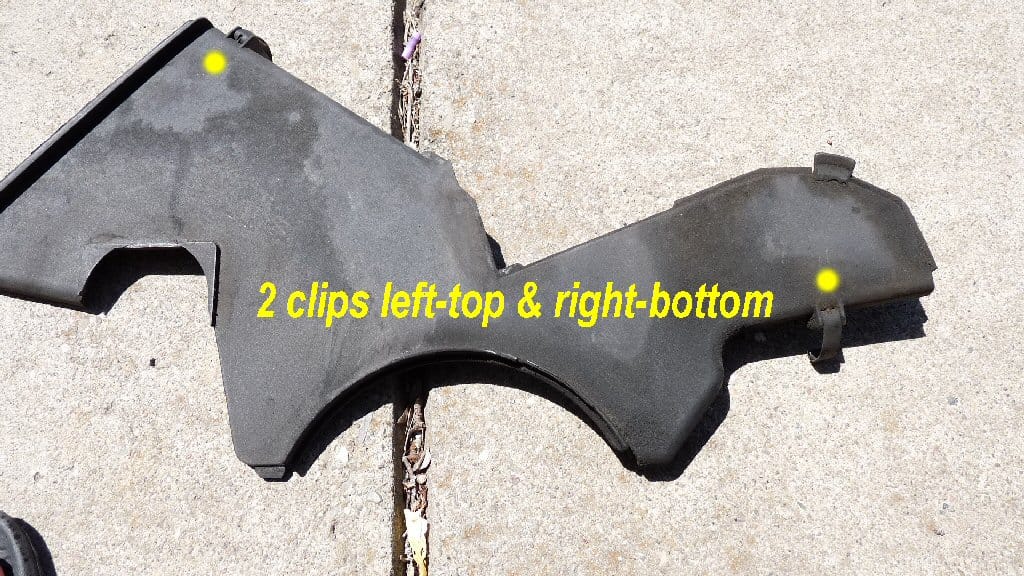
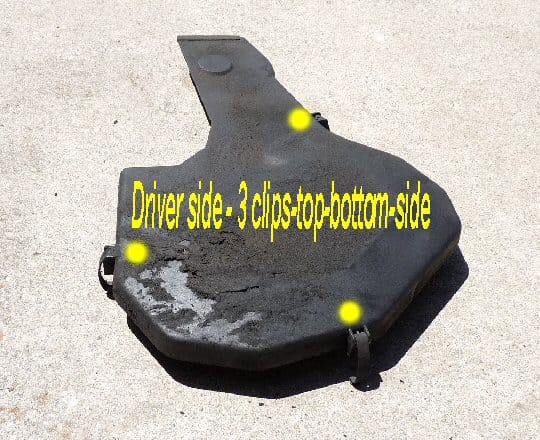
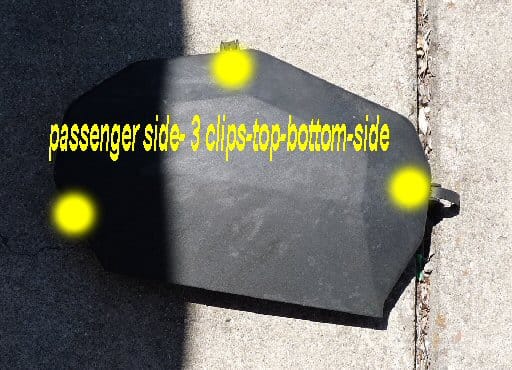
Remove the T-Belt covers: 3 piece, right & left first, then the middle one. Notice the clips positions.
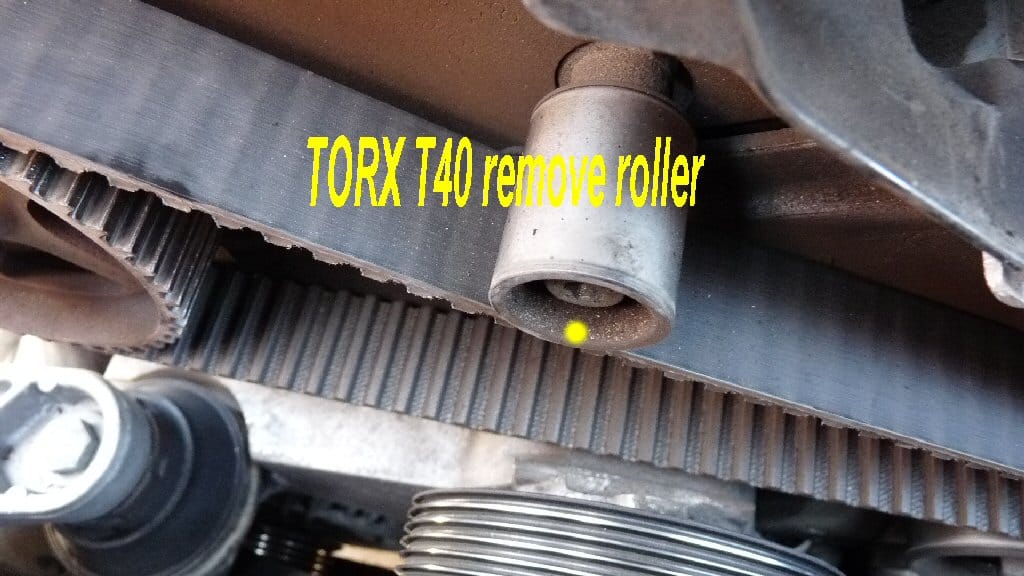
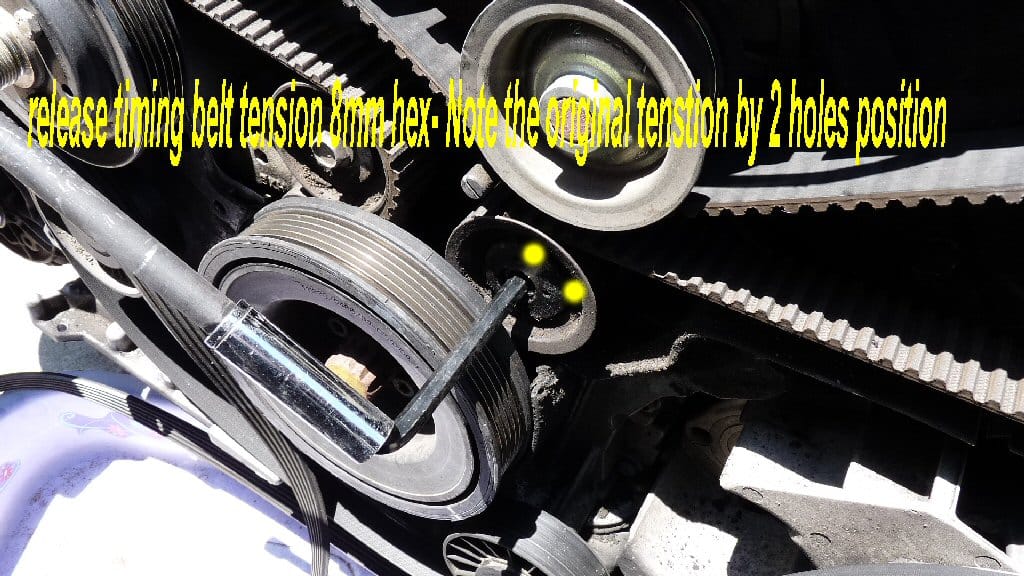
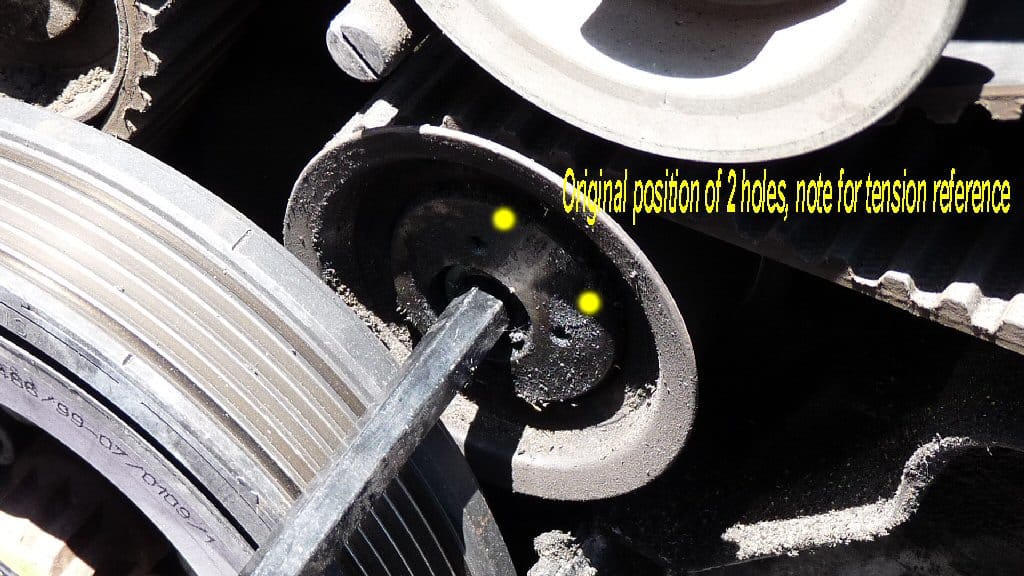
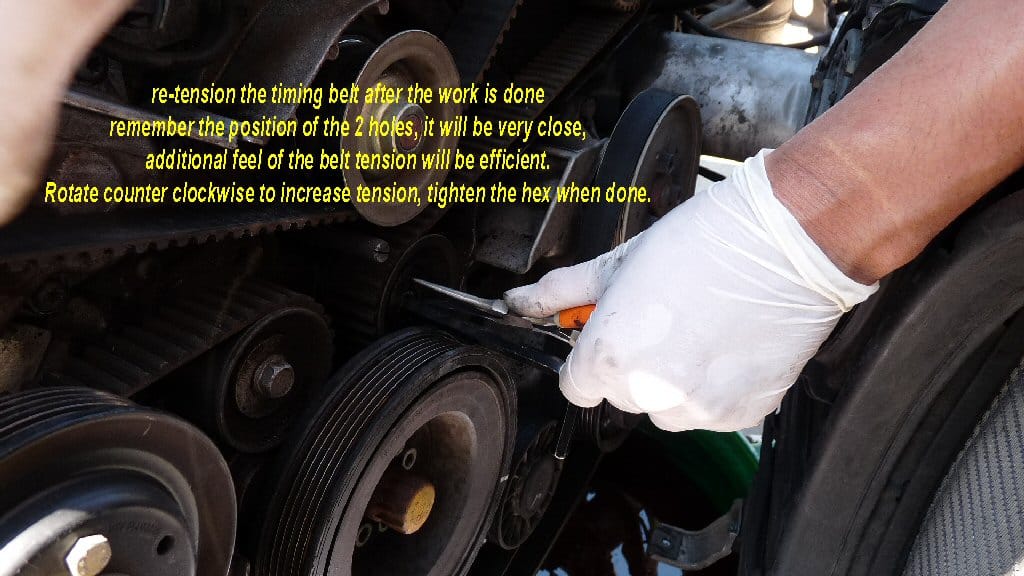
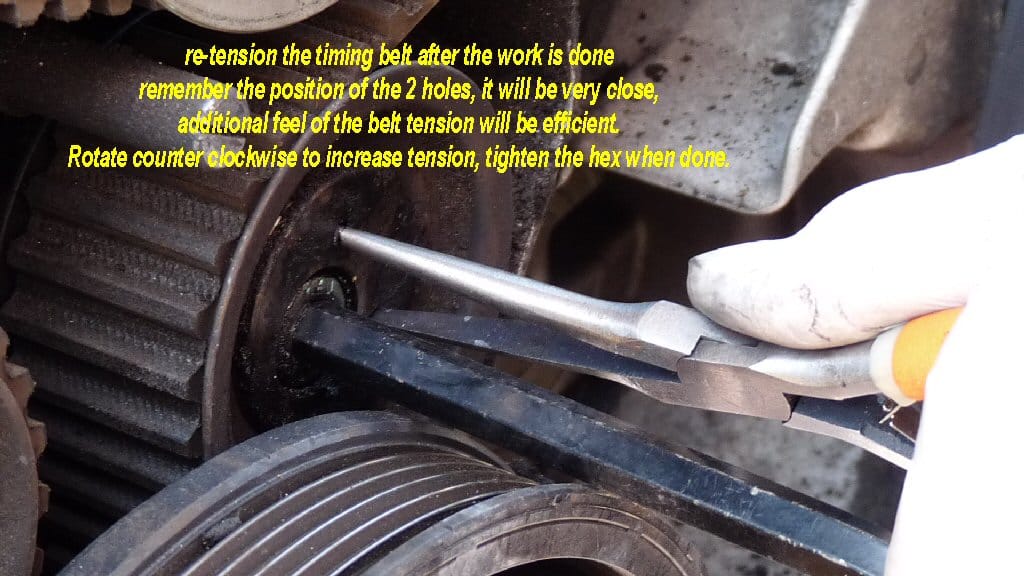
Remove the little roller on top with T-40 Torx, release the tensioner with 8mm hex: Should notice the tension of the belt, feel it with the hand and the position of the 2 holes of the eccentric roller so we can get it back to the same position when we re-tension the T-belt when done.
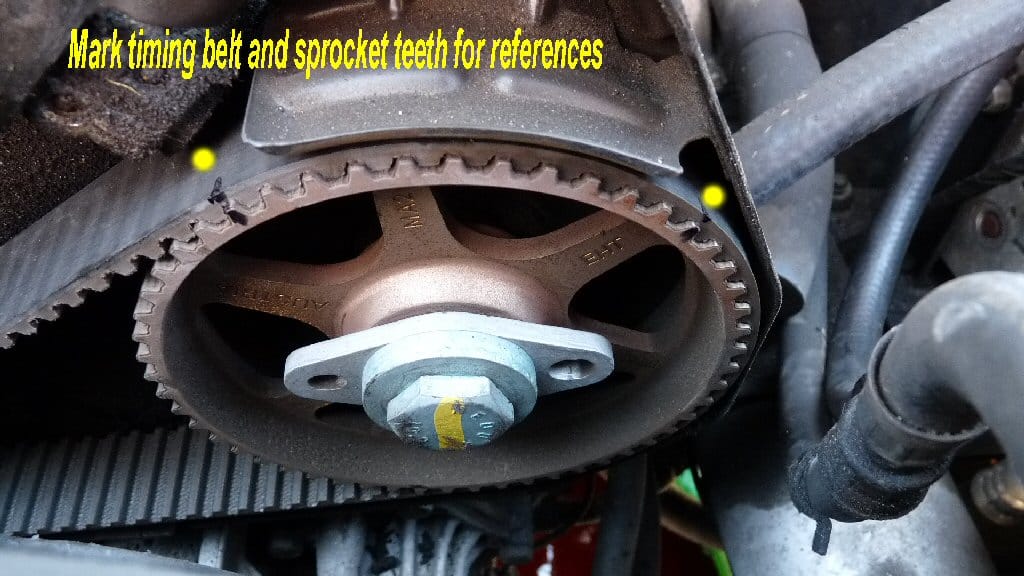
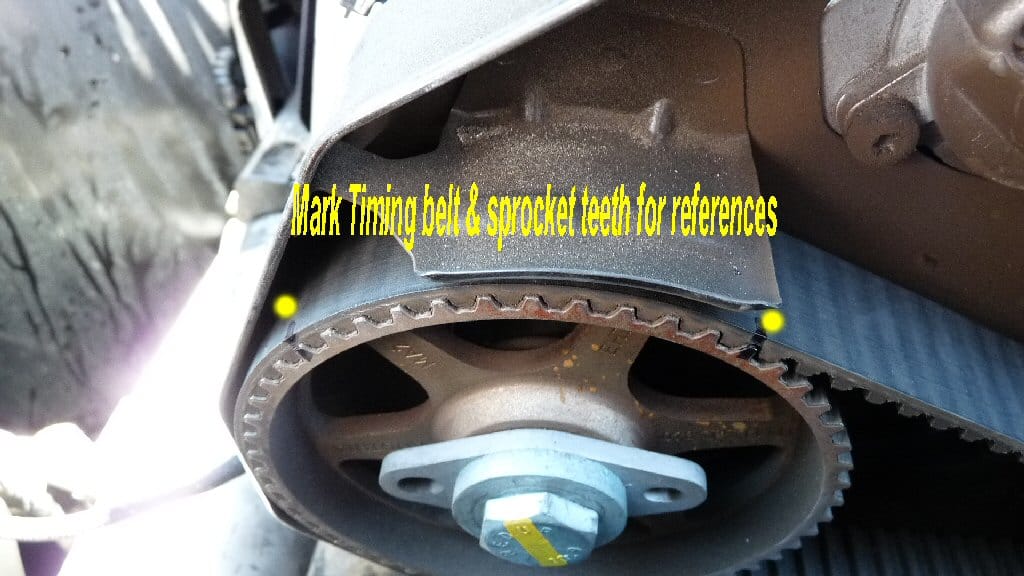
Mark T-belt with cam sprockets on both size and secure the sprocket with tie-wrap, MAKE SURE TO REMOVE THESE TIE-WRAP when DONE.
Pull the passenger side T-belt out about 1/2 way and remove the bolts & screw securing the black metal back plate to loosen it. It’s useful when sliding the thermostat cover out to clear the thermostat later.

Remove the radiator hose connected to the thermostat housing (cover).
")
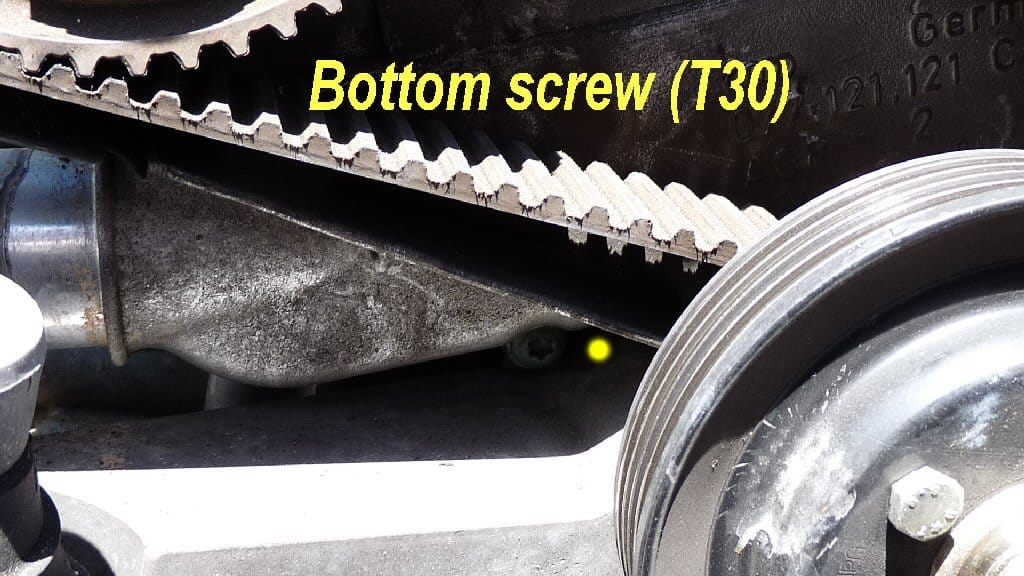
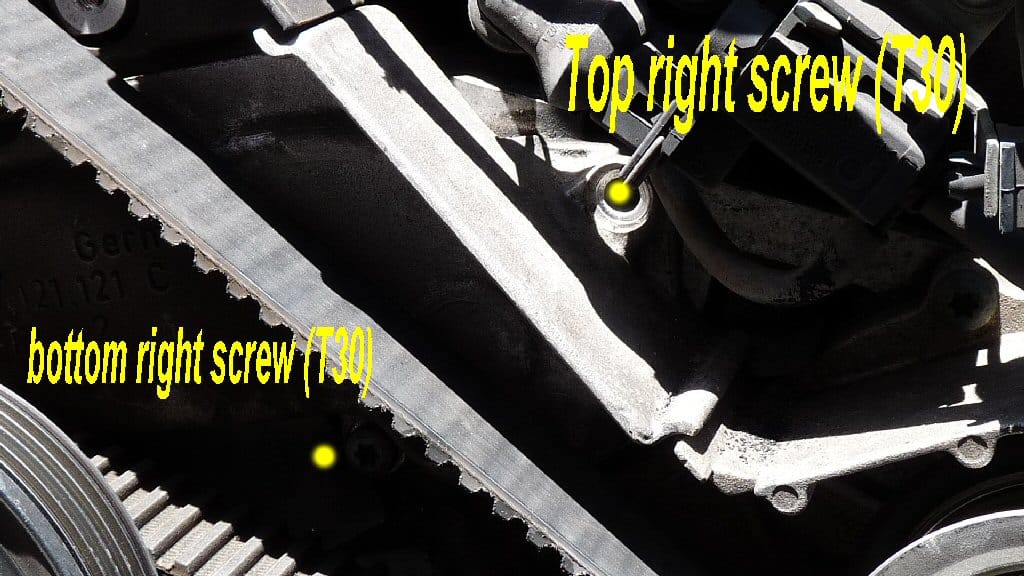
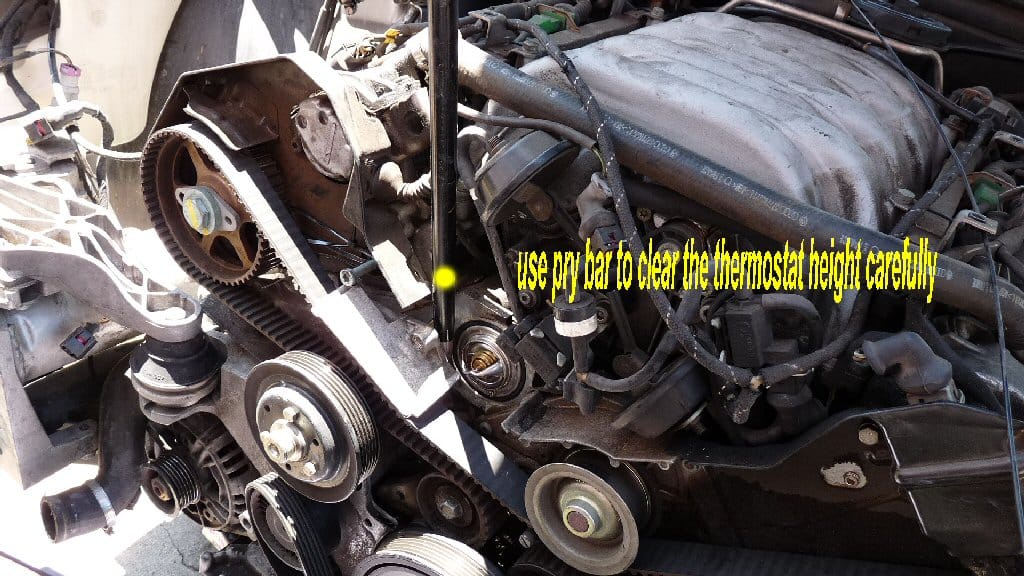
There are 3 Torx T30 screws securing the thermostat covers, 1 top right and 2 bottom, unscrew these and start to wiggle the aluminum cover, use a pry bar to give some pressure to clear the thermostat, use the round one carefully not to scratch the surface of the block and the cover itself.


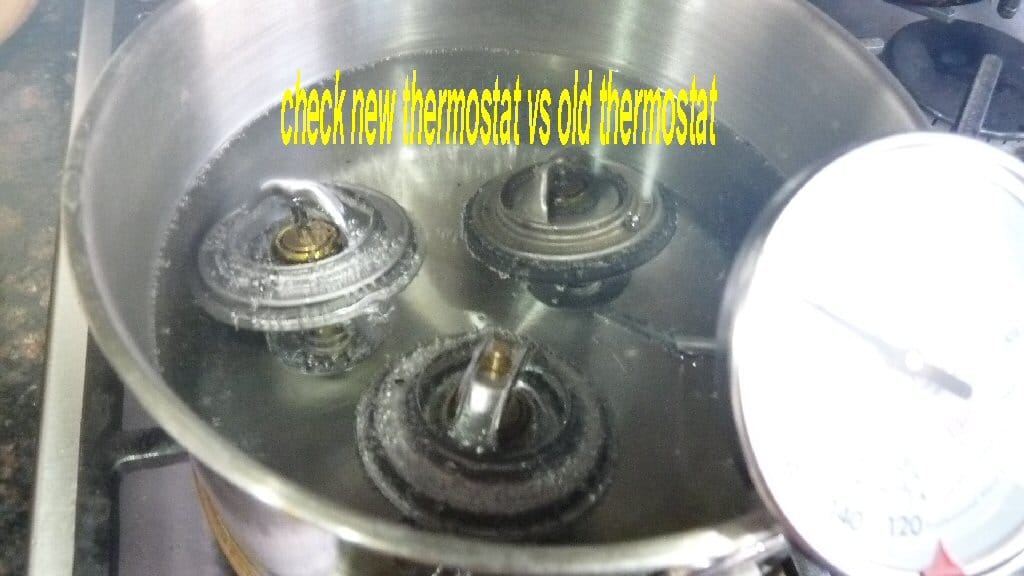
Remove the thermostat, don’t pry out the old one, we may scratch the surface, just use a screw driver and a little hammer knocking on the old thermostat to loosen and take it out. Boil the water, place old and new thermostat to make sure the new one opens and the old one stuck close or not, in our case, the old one stuck close the whole time even when the new one fully opened even at 110C.
We used the 87C 077121113F for the 98 A8, the 2000 can be 82C xxxx13C or 92C xxxx13G.
OK, the new one works, we need to put on the seal and ready to put it back, clean both surfaces, the block and the cover. To put it back, we also need to slide the thermostat in slowly and carefully, we gave it a little tap at the end of the cover to force it over the thermostat with the help of the pry bar (the same way we took it out).

When the housing is cleared over the thermostat, we need to re-position the thermostat with the arrow up-up and the RUBBER RING neatly in place. We actually installed the rubber ring after the housing went (clear) over the thermostat. DON’T FORGET THE RING!!!!
Screw back the 3 T30 Torx screws diagonally (evenly), the black metal plate (3 or 4 bolts + 1 T30 torx).
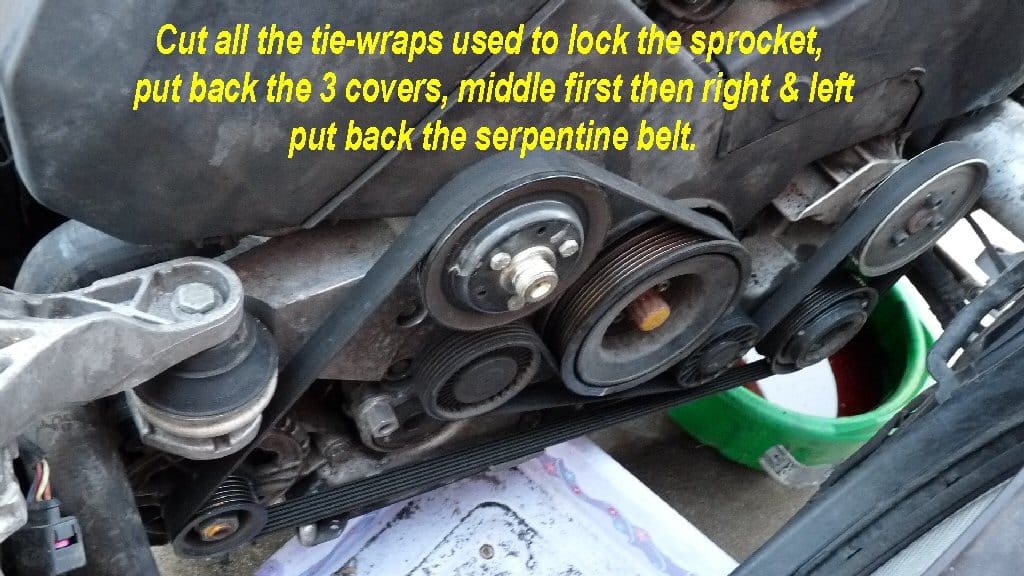
SLIDE THE TIMING BELT BACK AT THE CAM SPROCKET, CUT THE TIE-WRAP NOW so WE DON’T FORGET LATER…
Re-Adjust the T-Belt tensioner back to the original position, first, install the LITTLE TOP ROLLER with the T40 Torx we took out earlier and use it bolt to tie the tie-wrap. Long nose plier is a must. Remember the position of the 2 little holes NOW.
AGAIN, MAKE SURE THERE ARE NO TIE-WRAPS ON ANY SPROCKET, BELT, ANY WHERE, ALL BOLTS AND SCREWS ARE ALL SECURED, NON-LOOSE… We tighten snug tight, by feel, the best is to check out the torque specs and do it. Put back the cover: 3 of them, the middle one first then other 2.
Put back the serpentine belt with the direction of the marked belt earlier if using the old one. Put back the fan. Tighten the radiator screw, the hose… We have more work to do, the oil cooler next.